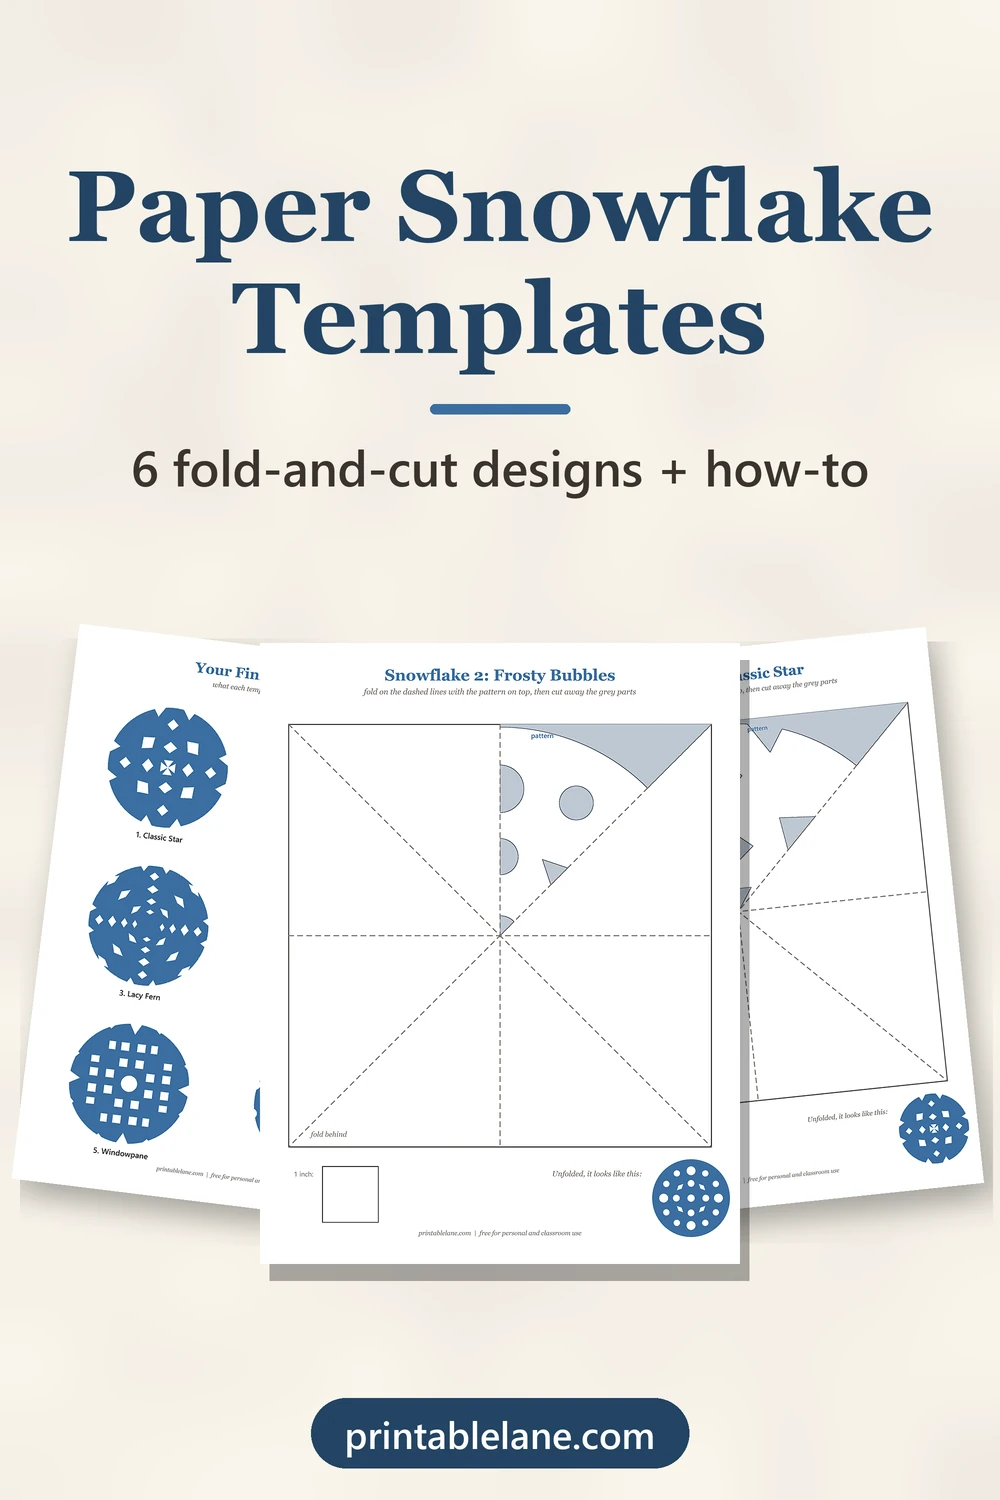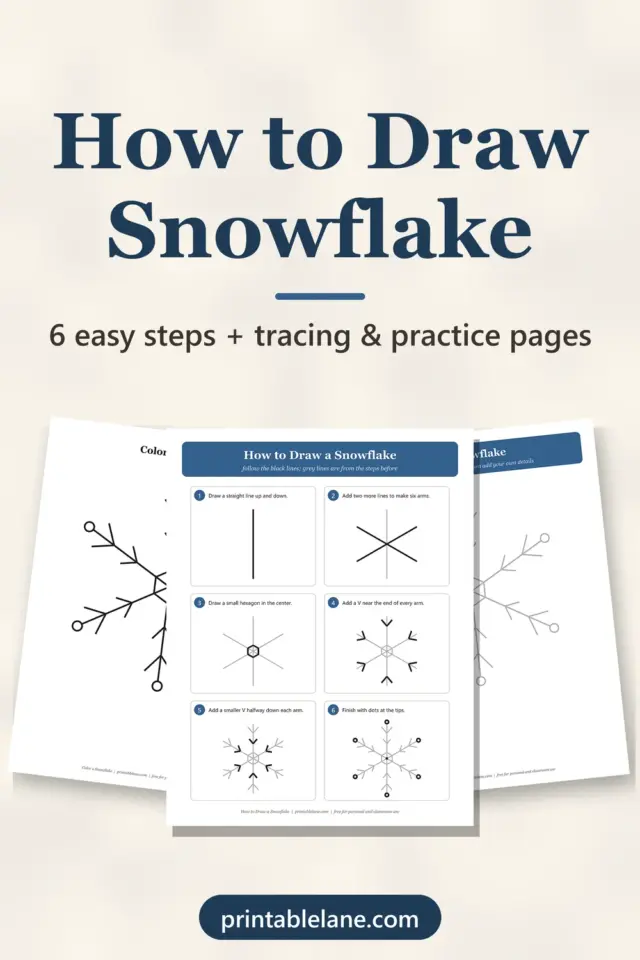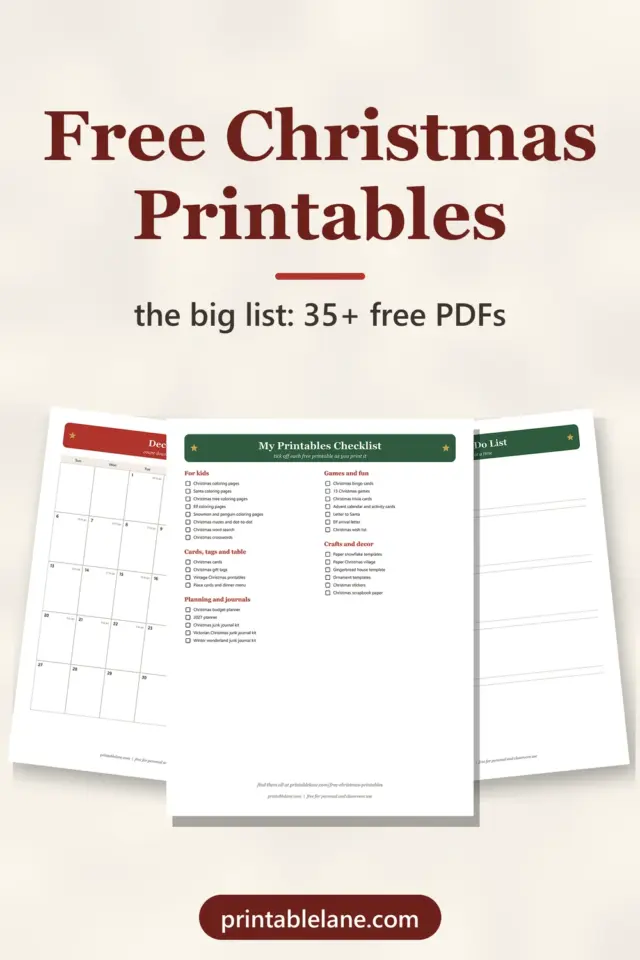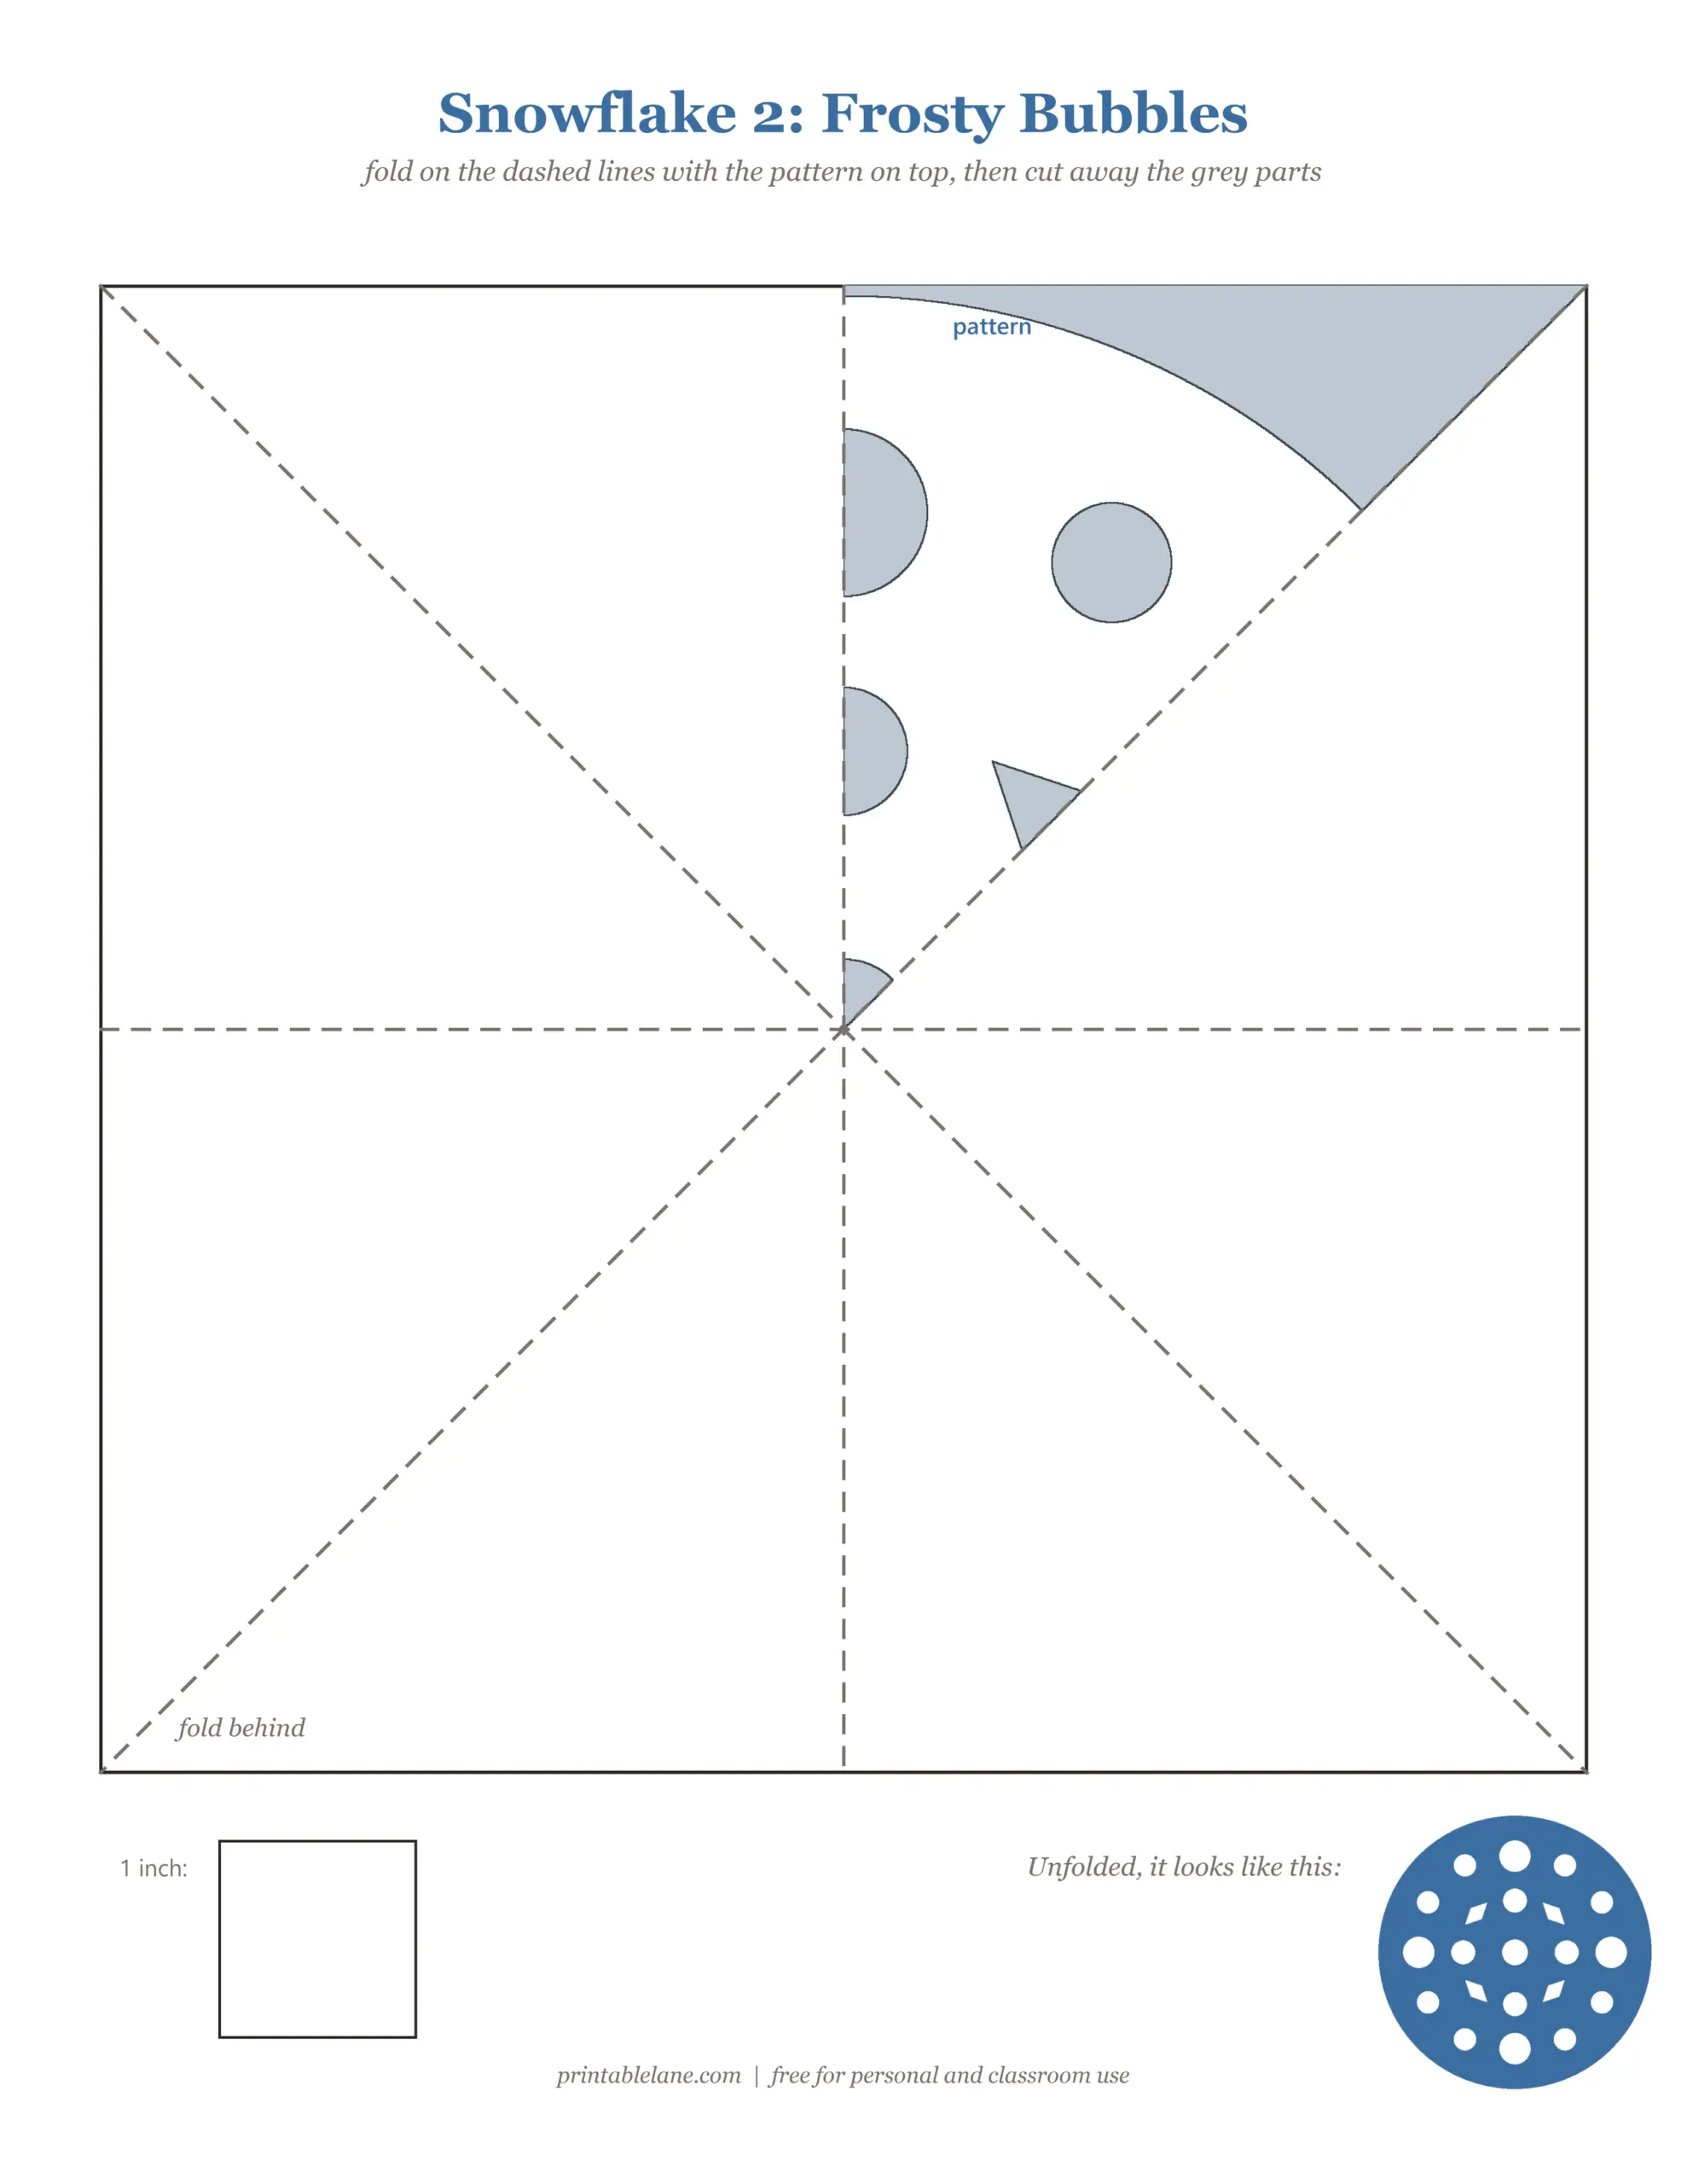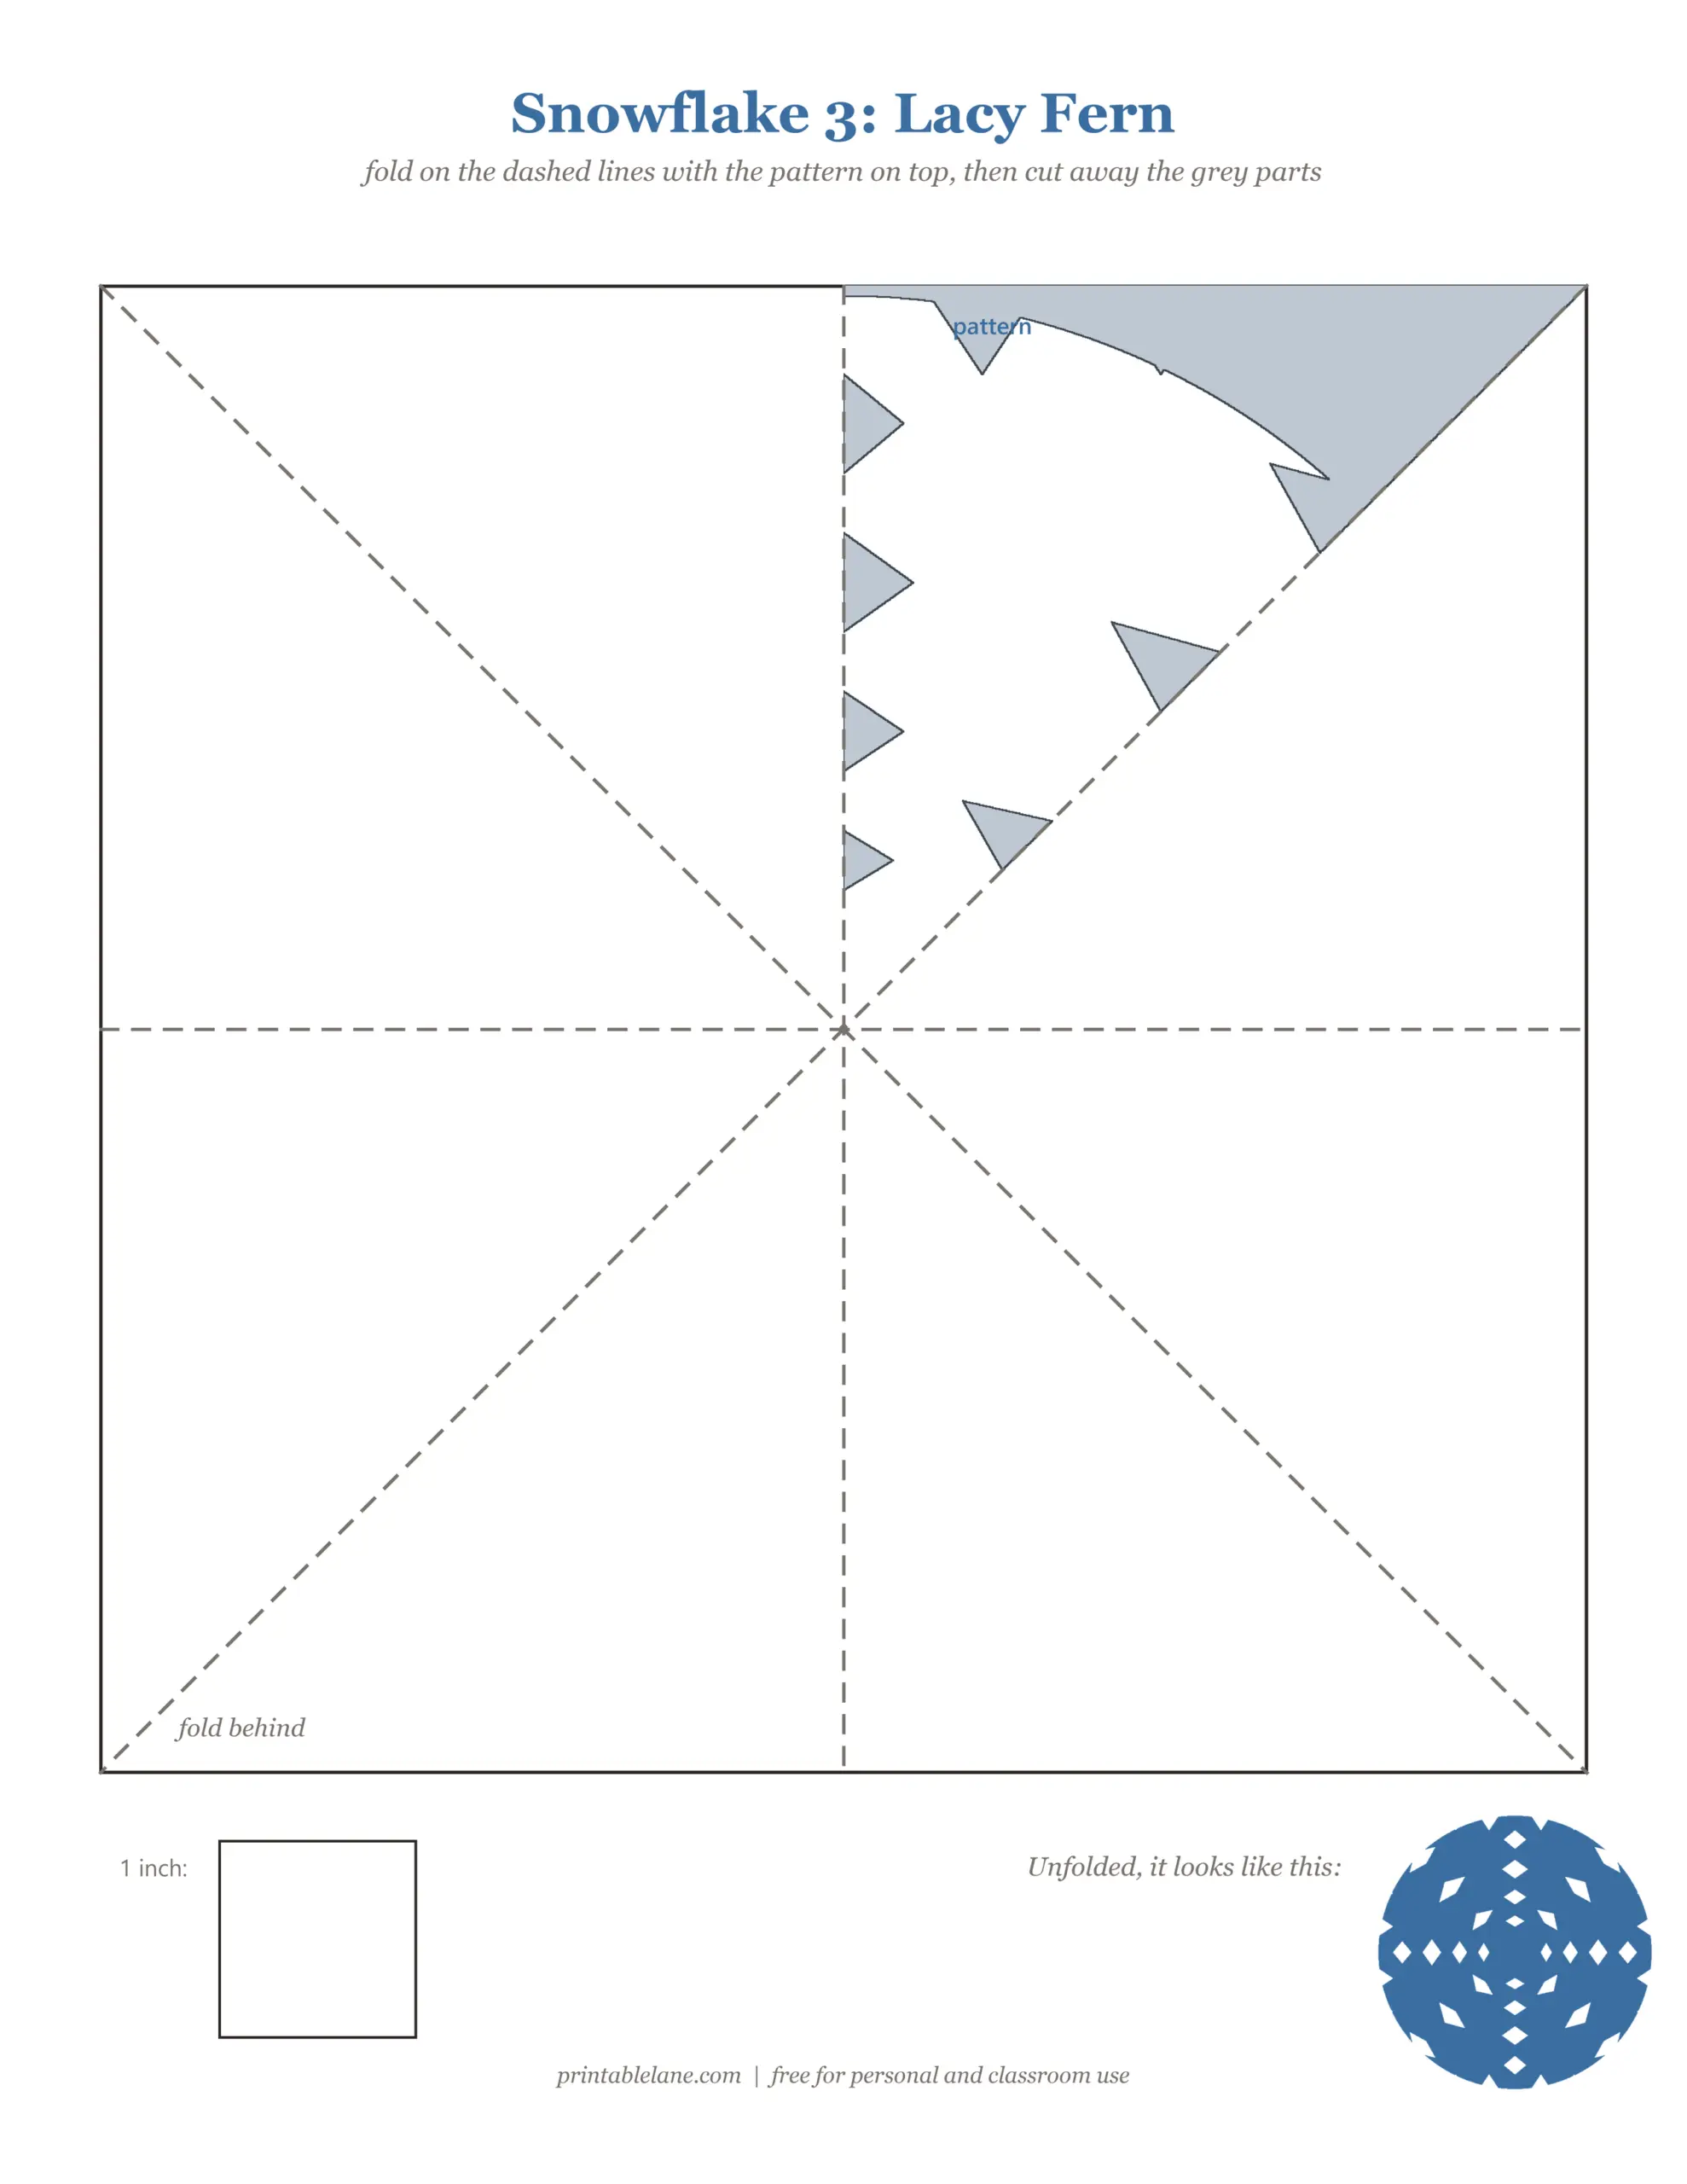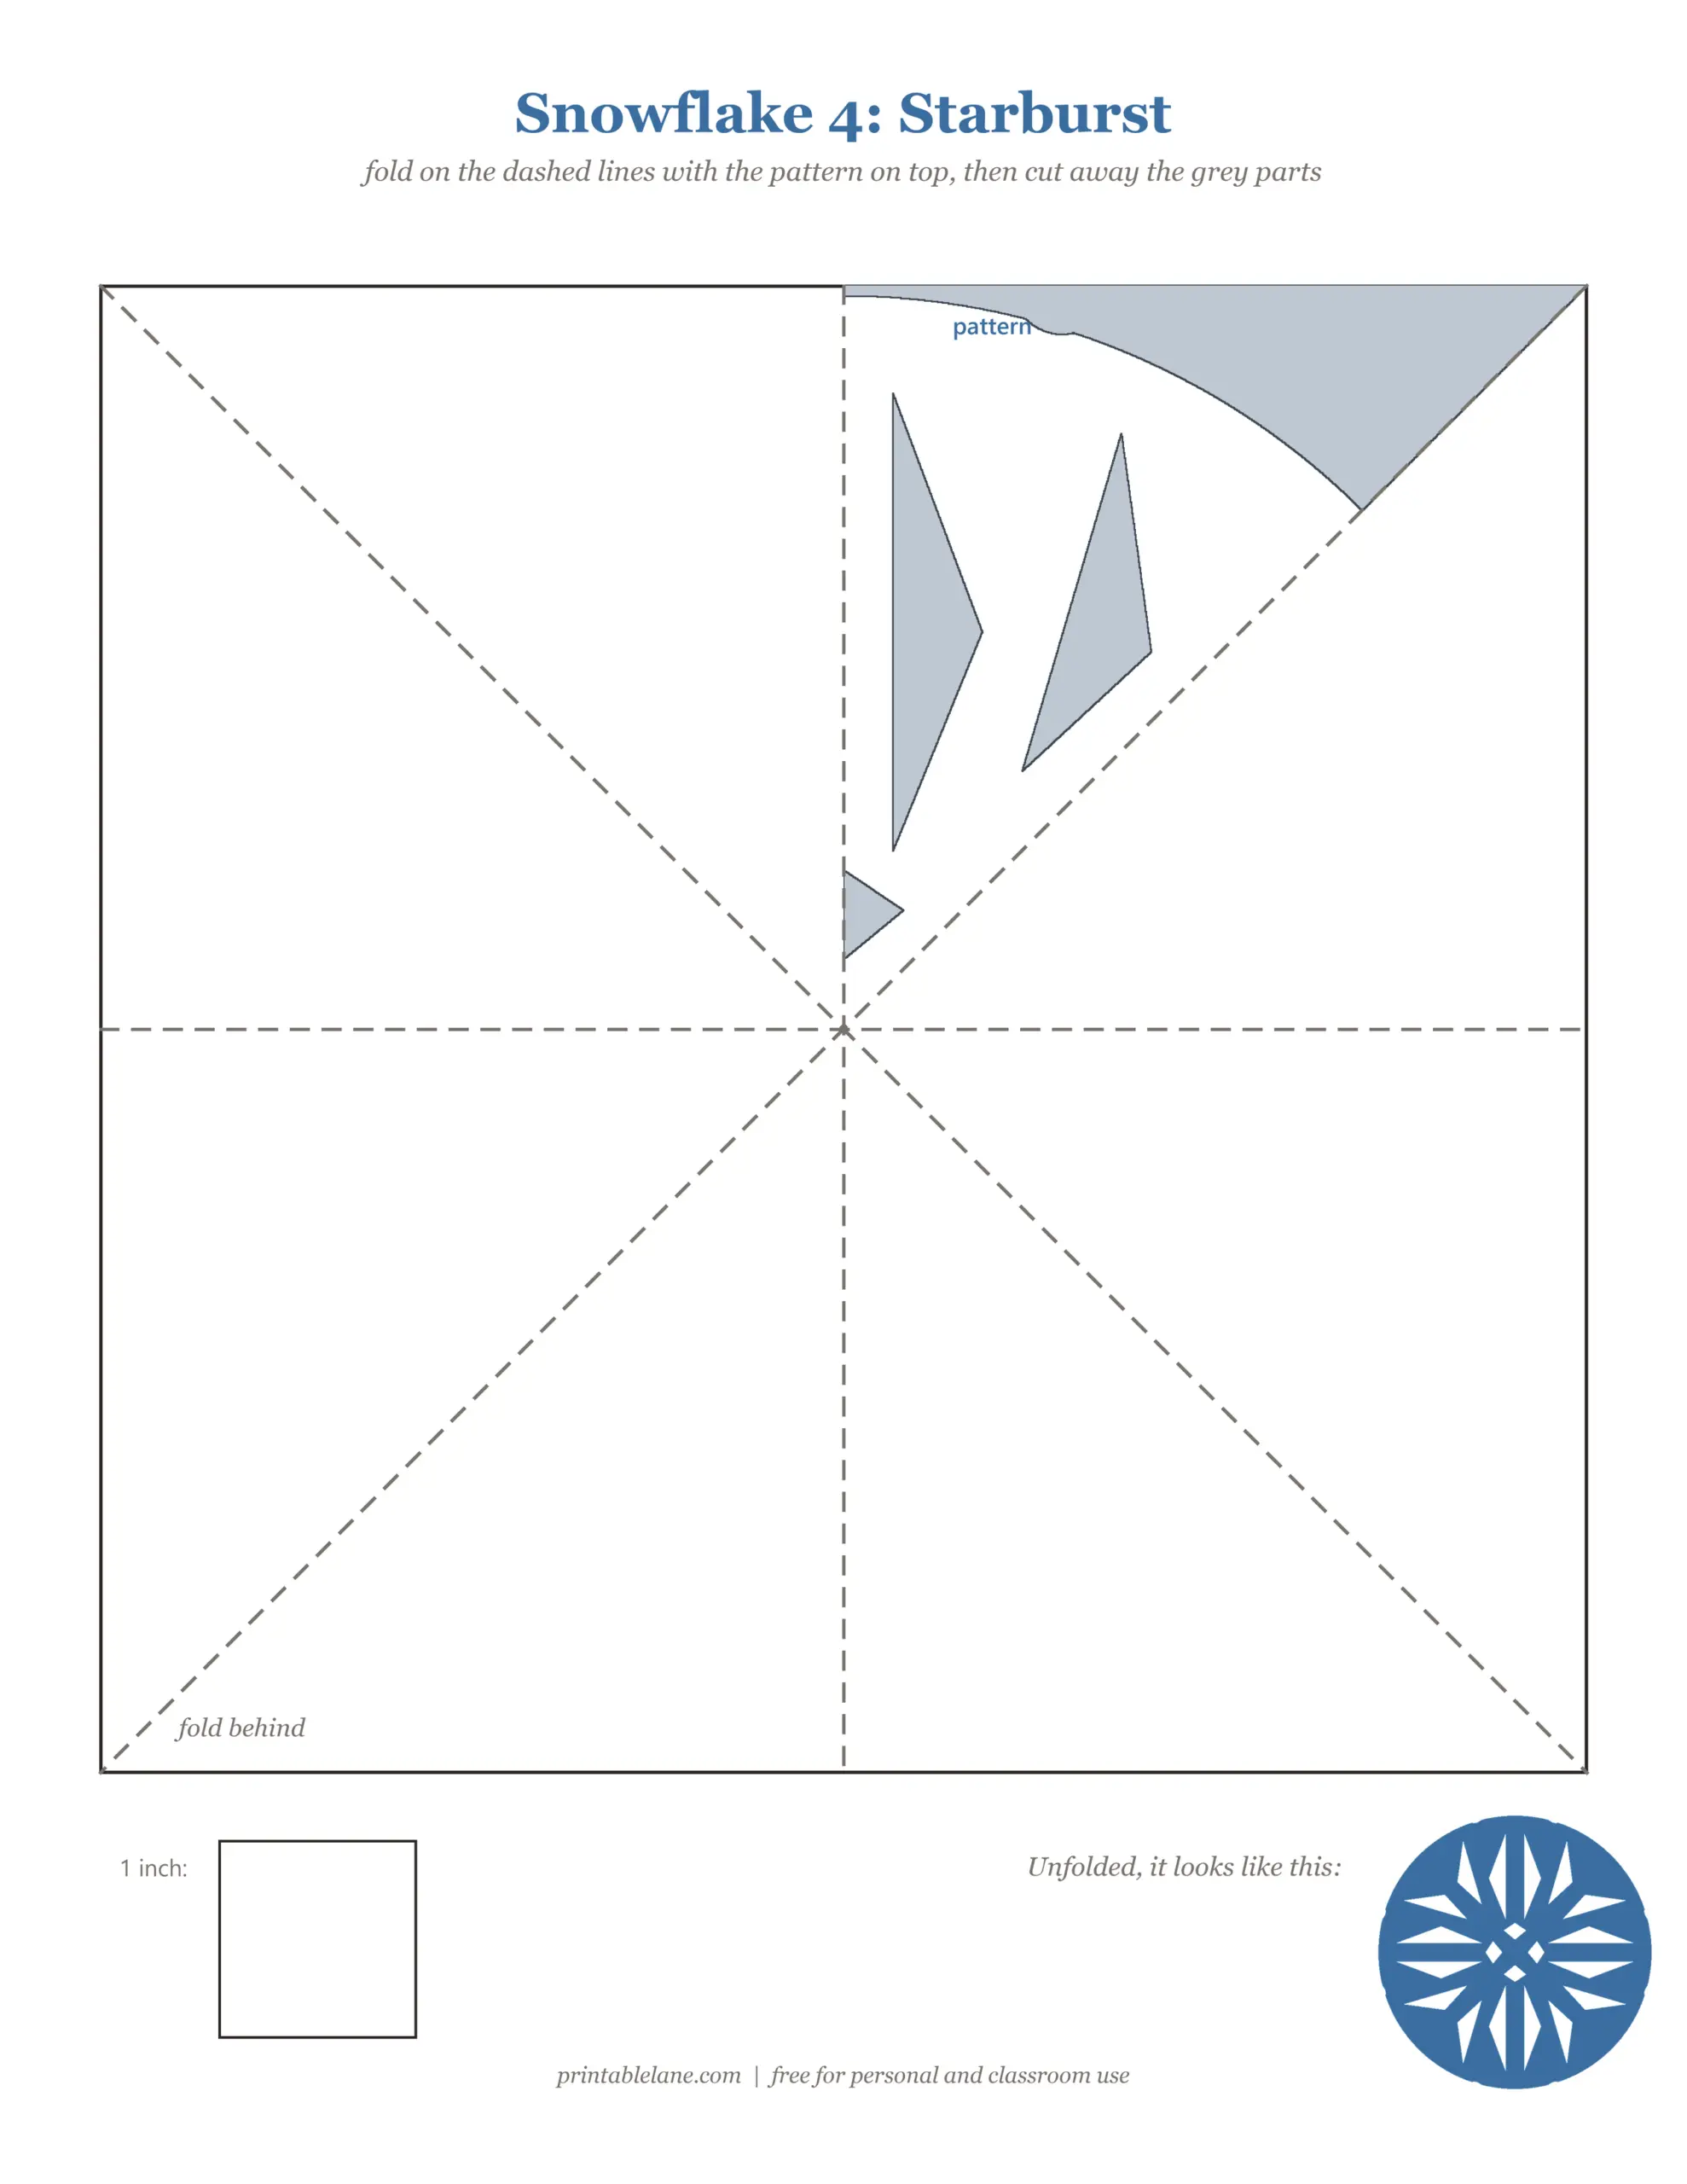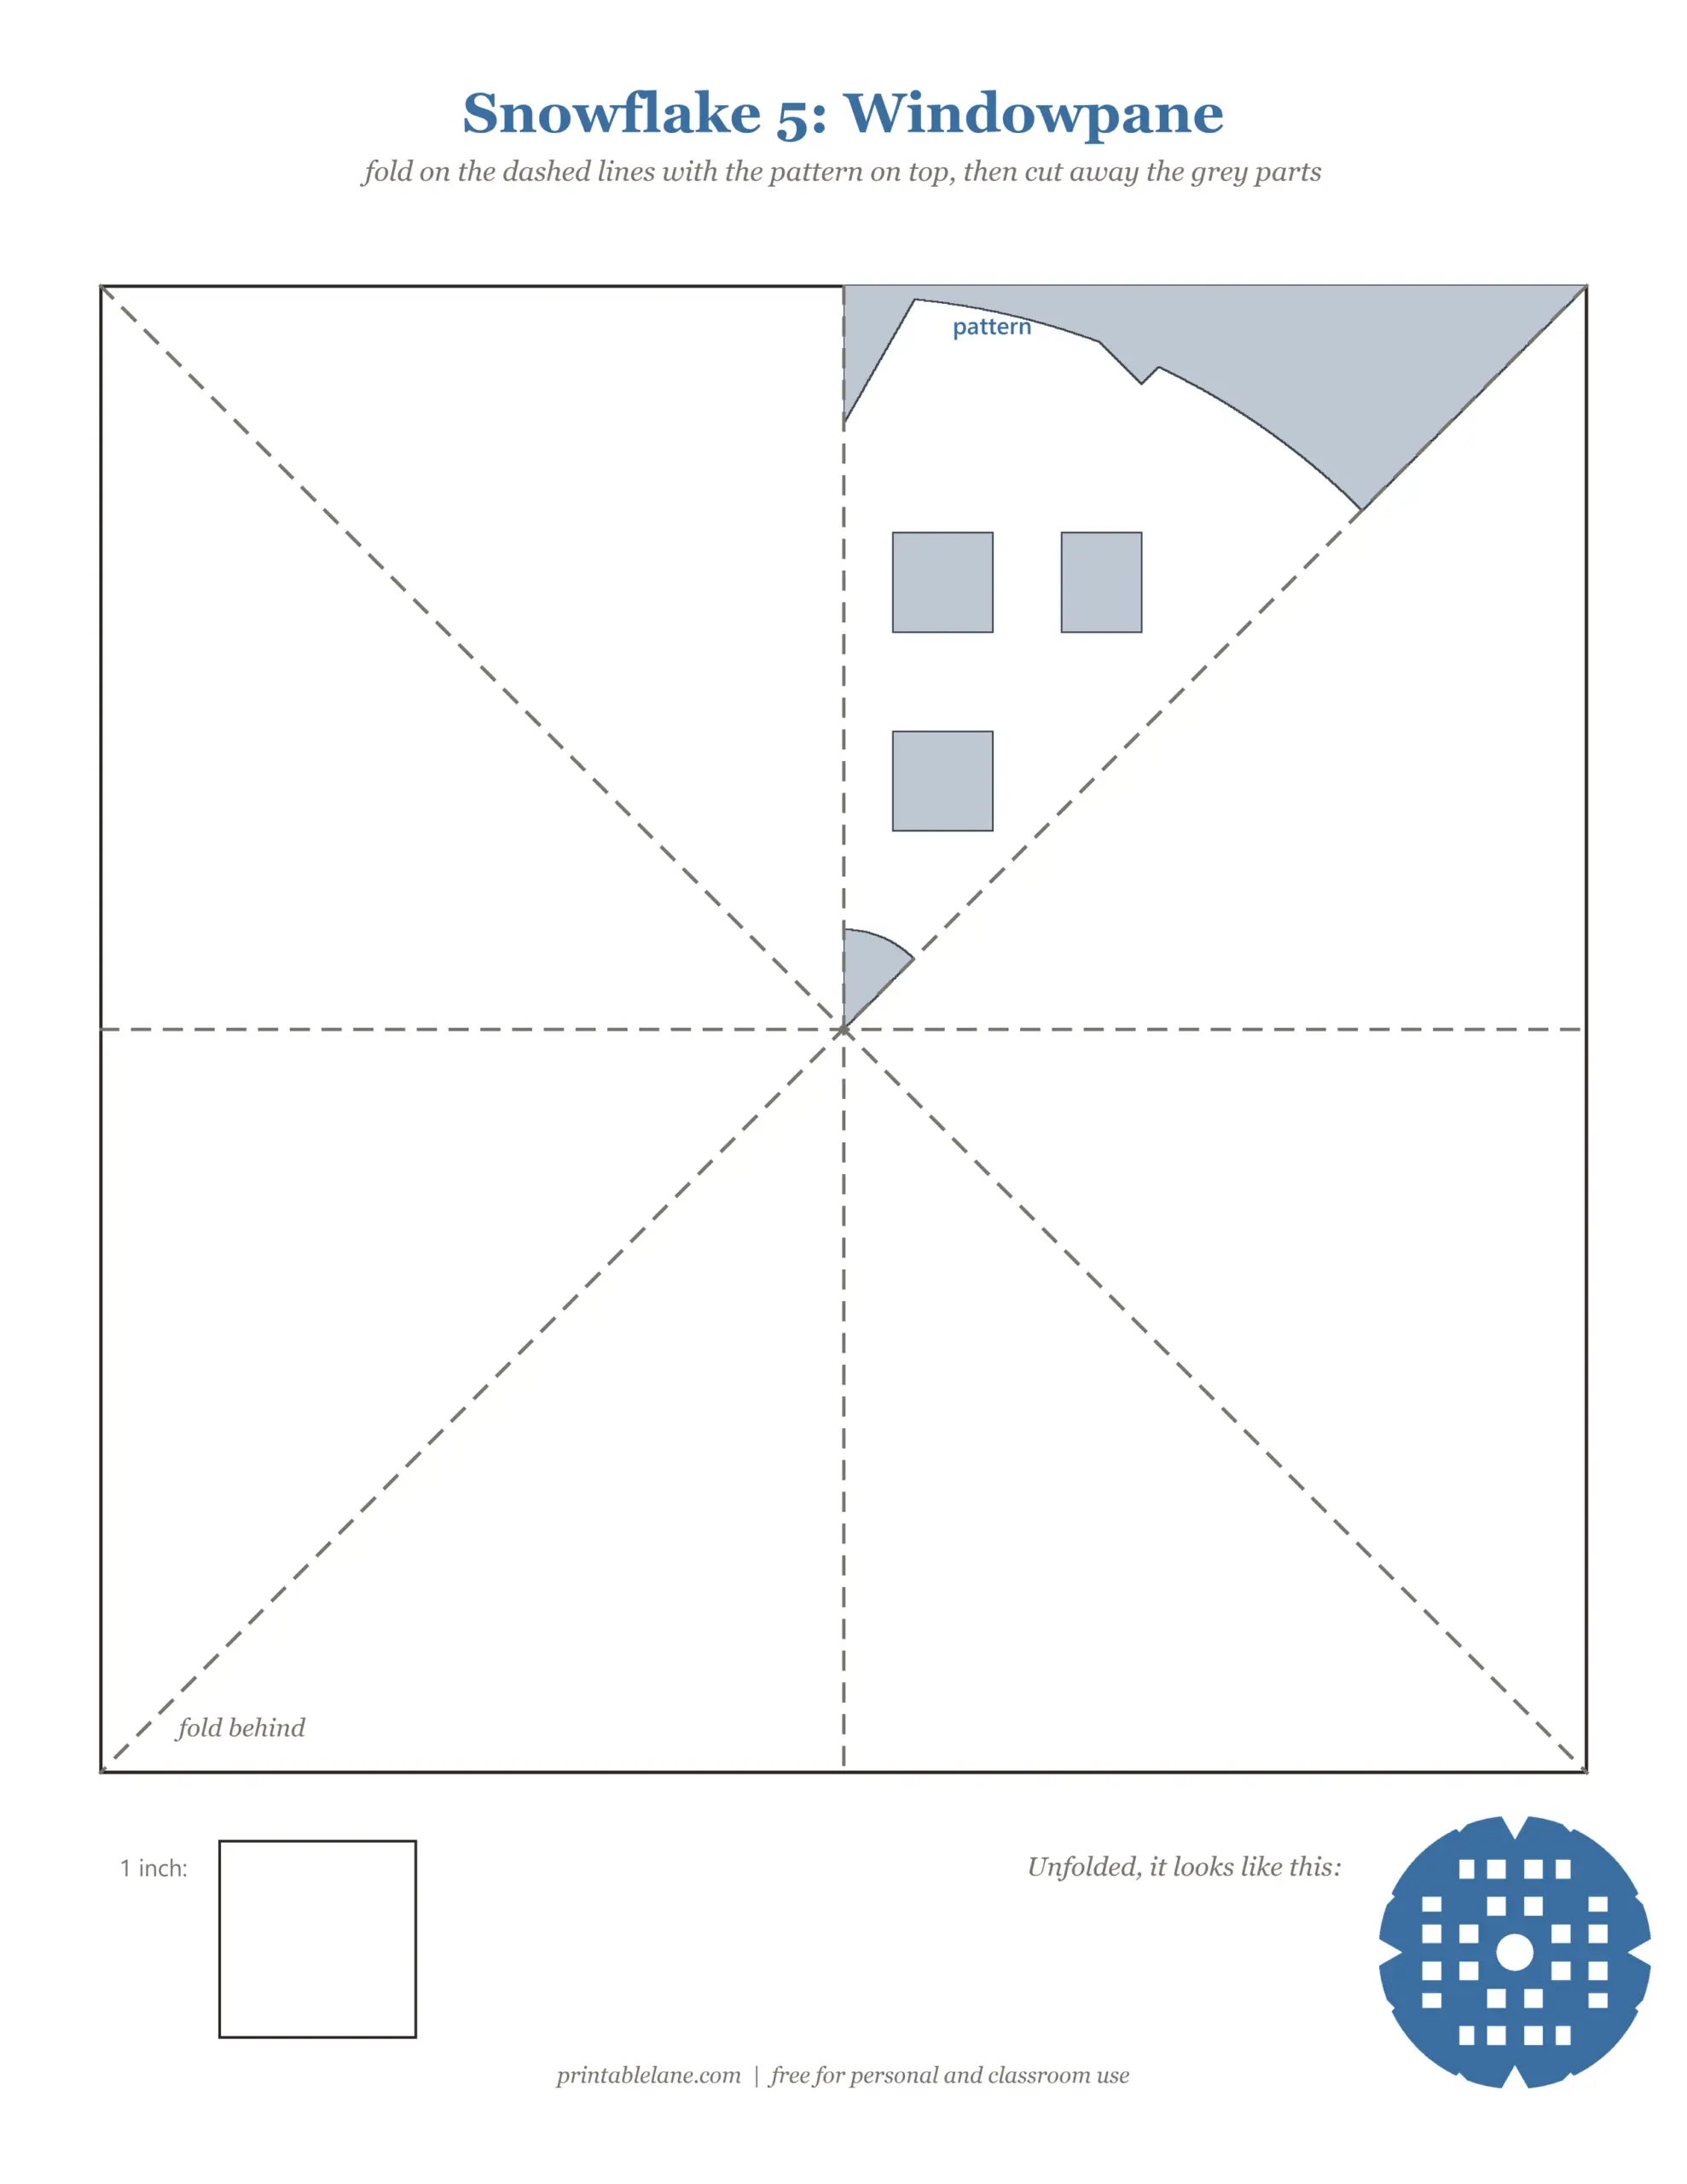
These paper snowflake templates take the guesswork out of cutting snowflakes. Print a page, fold it on the dashed lines with the pattern on top, cut away the grey parts and unfold: you get a round, 8-point snowflake that matches the preview on the page.
There are six designs, from an easy classic star to a lacy fern, plus a folding guide and a blank template to design your own. They are a calm winter craft for kids, a quick classroom activity and an easy way to decorate windows for the holidays.
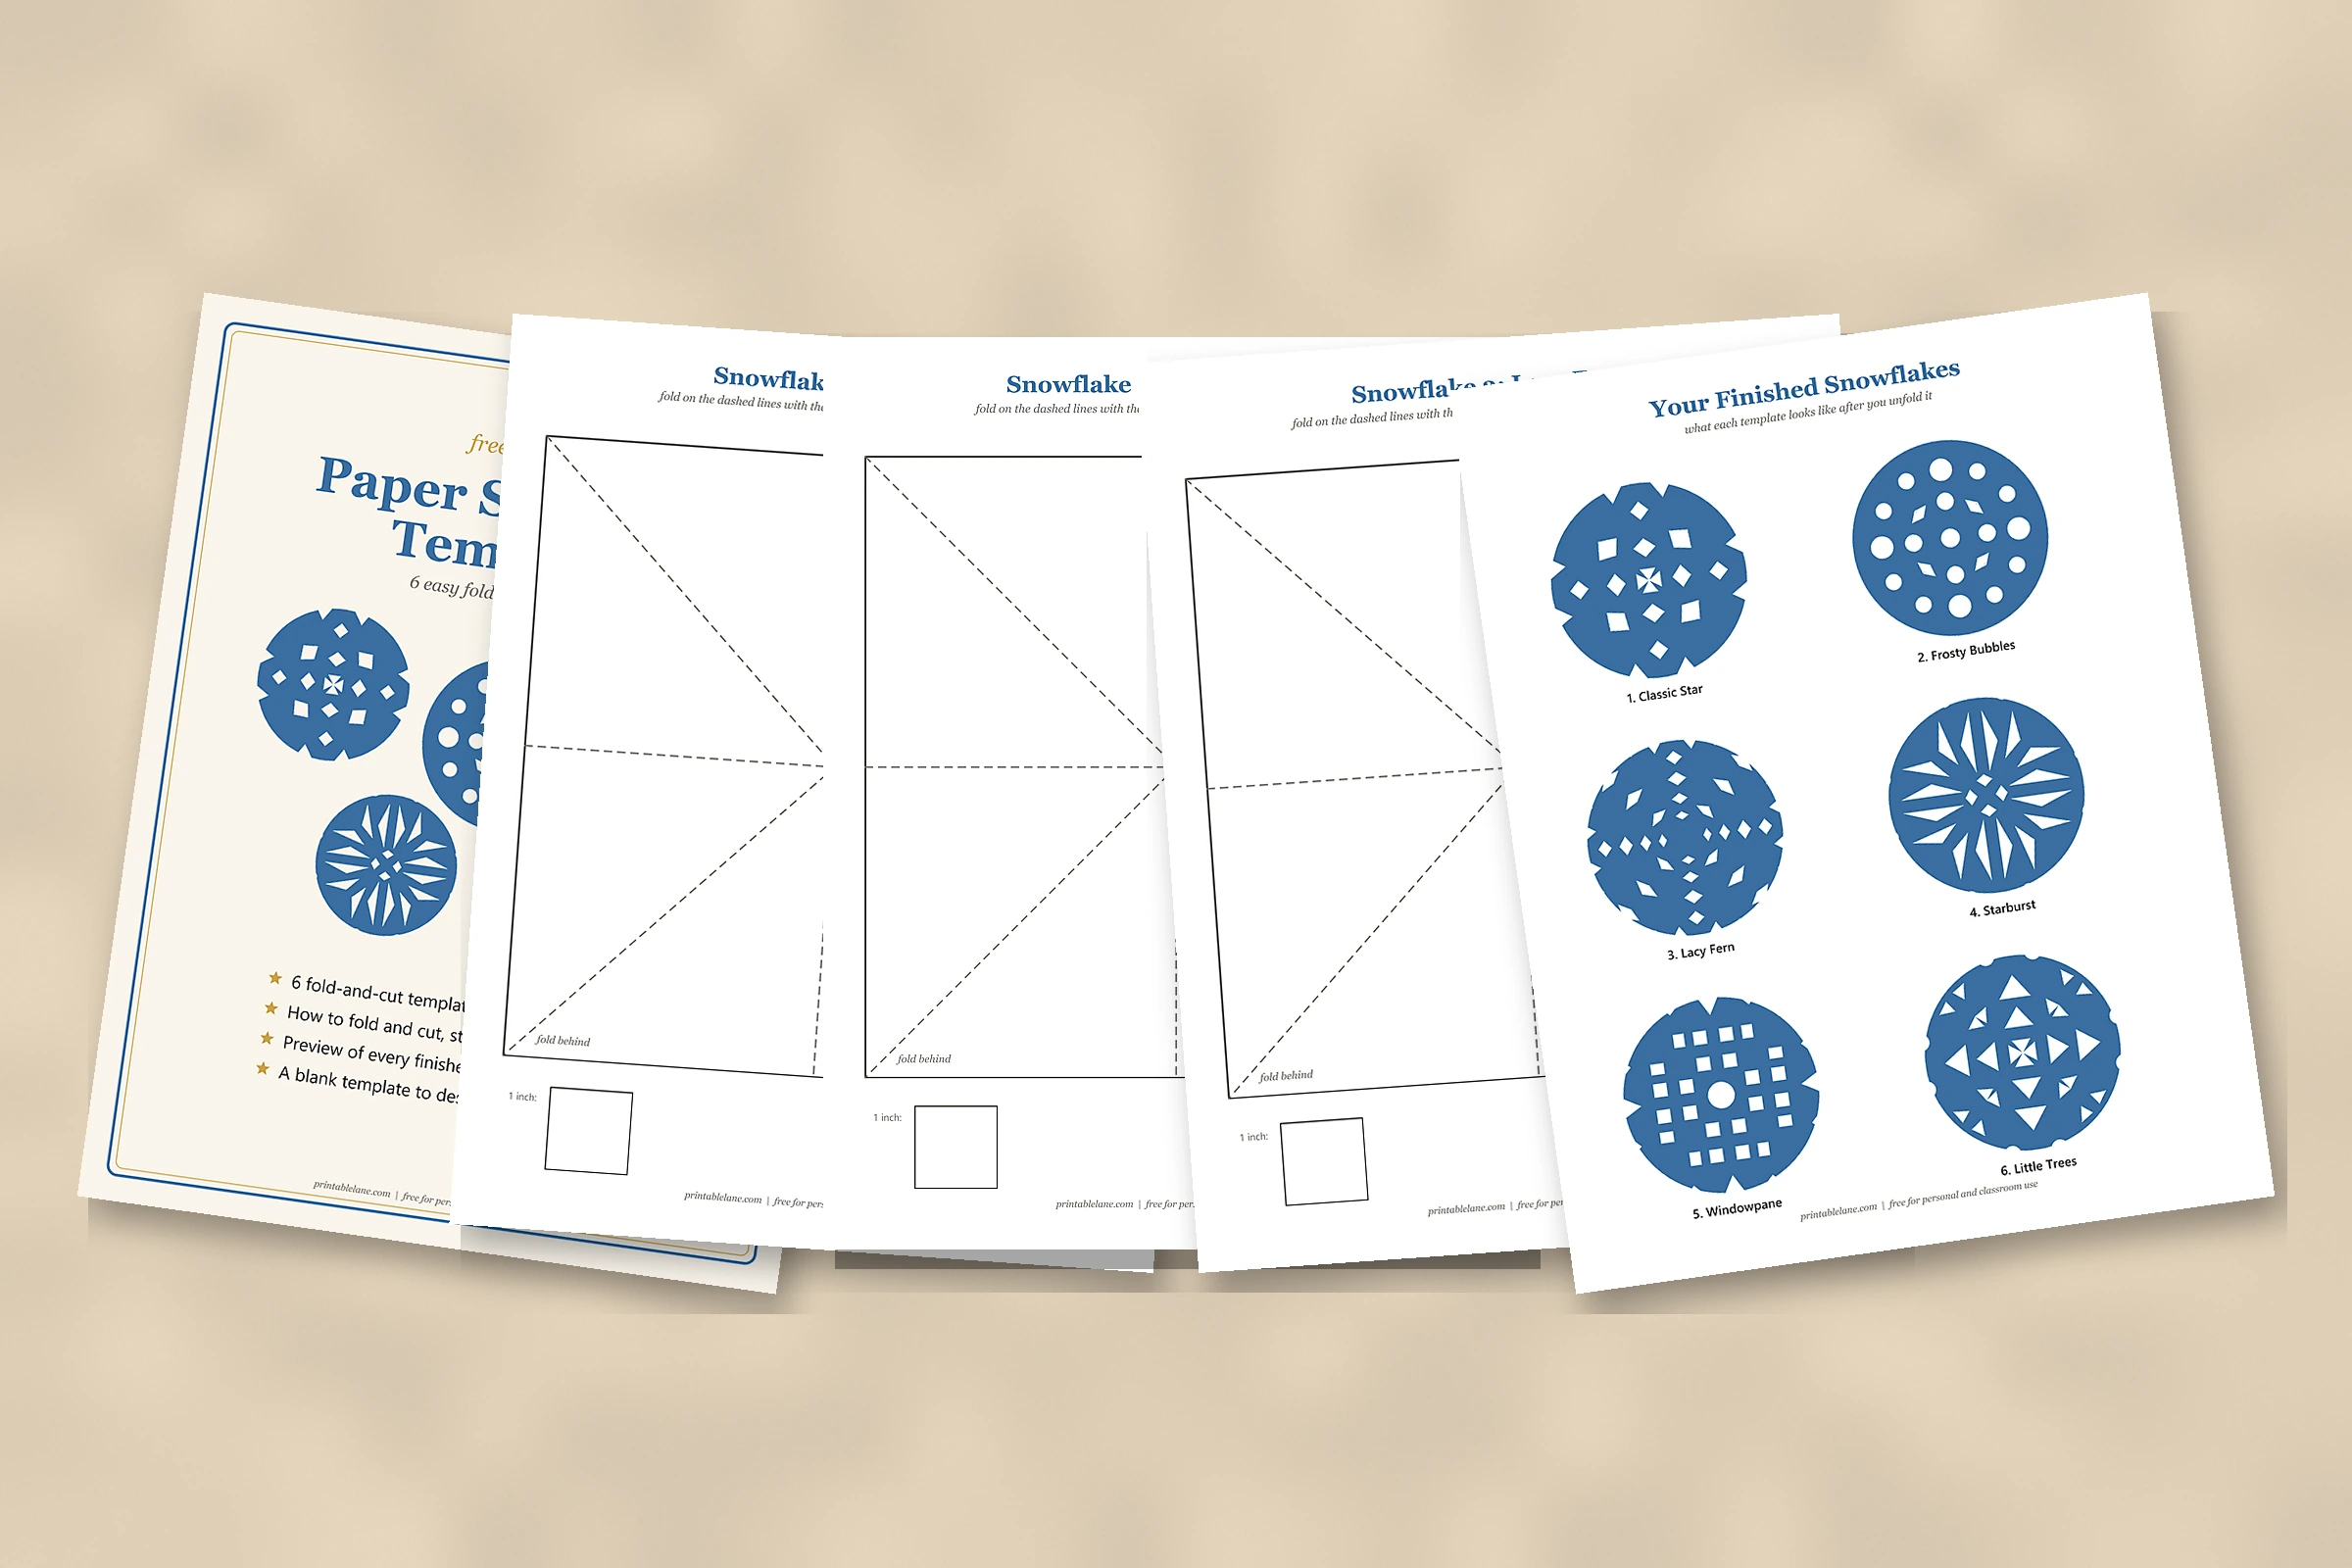
What is in the paper snowflake templates PDF
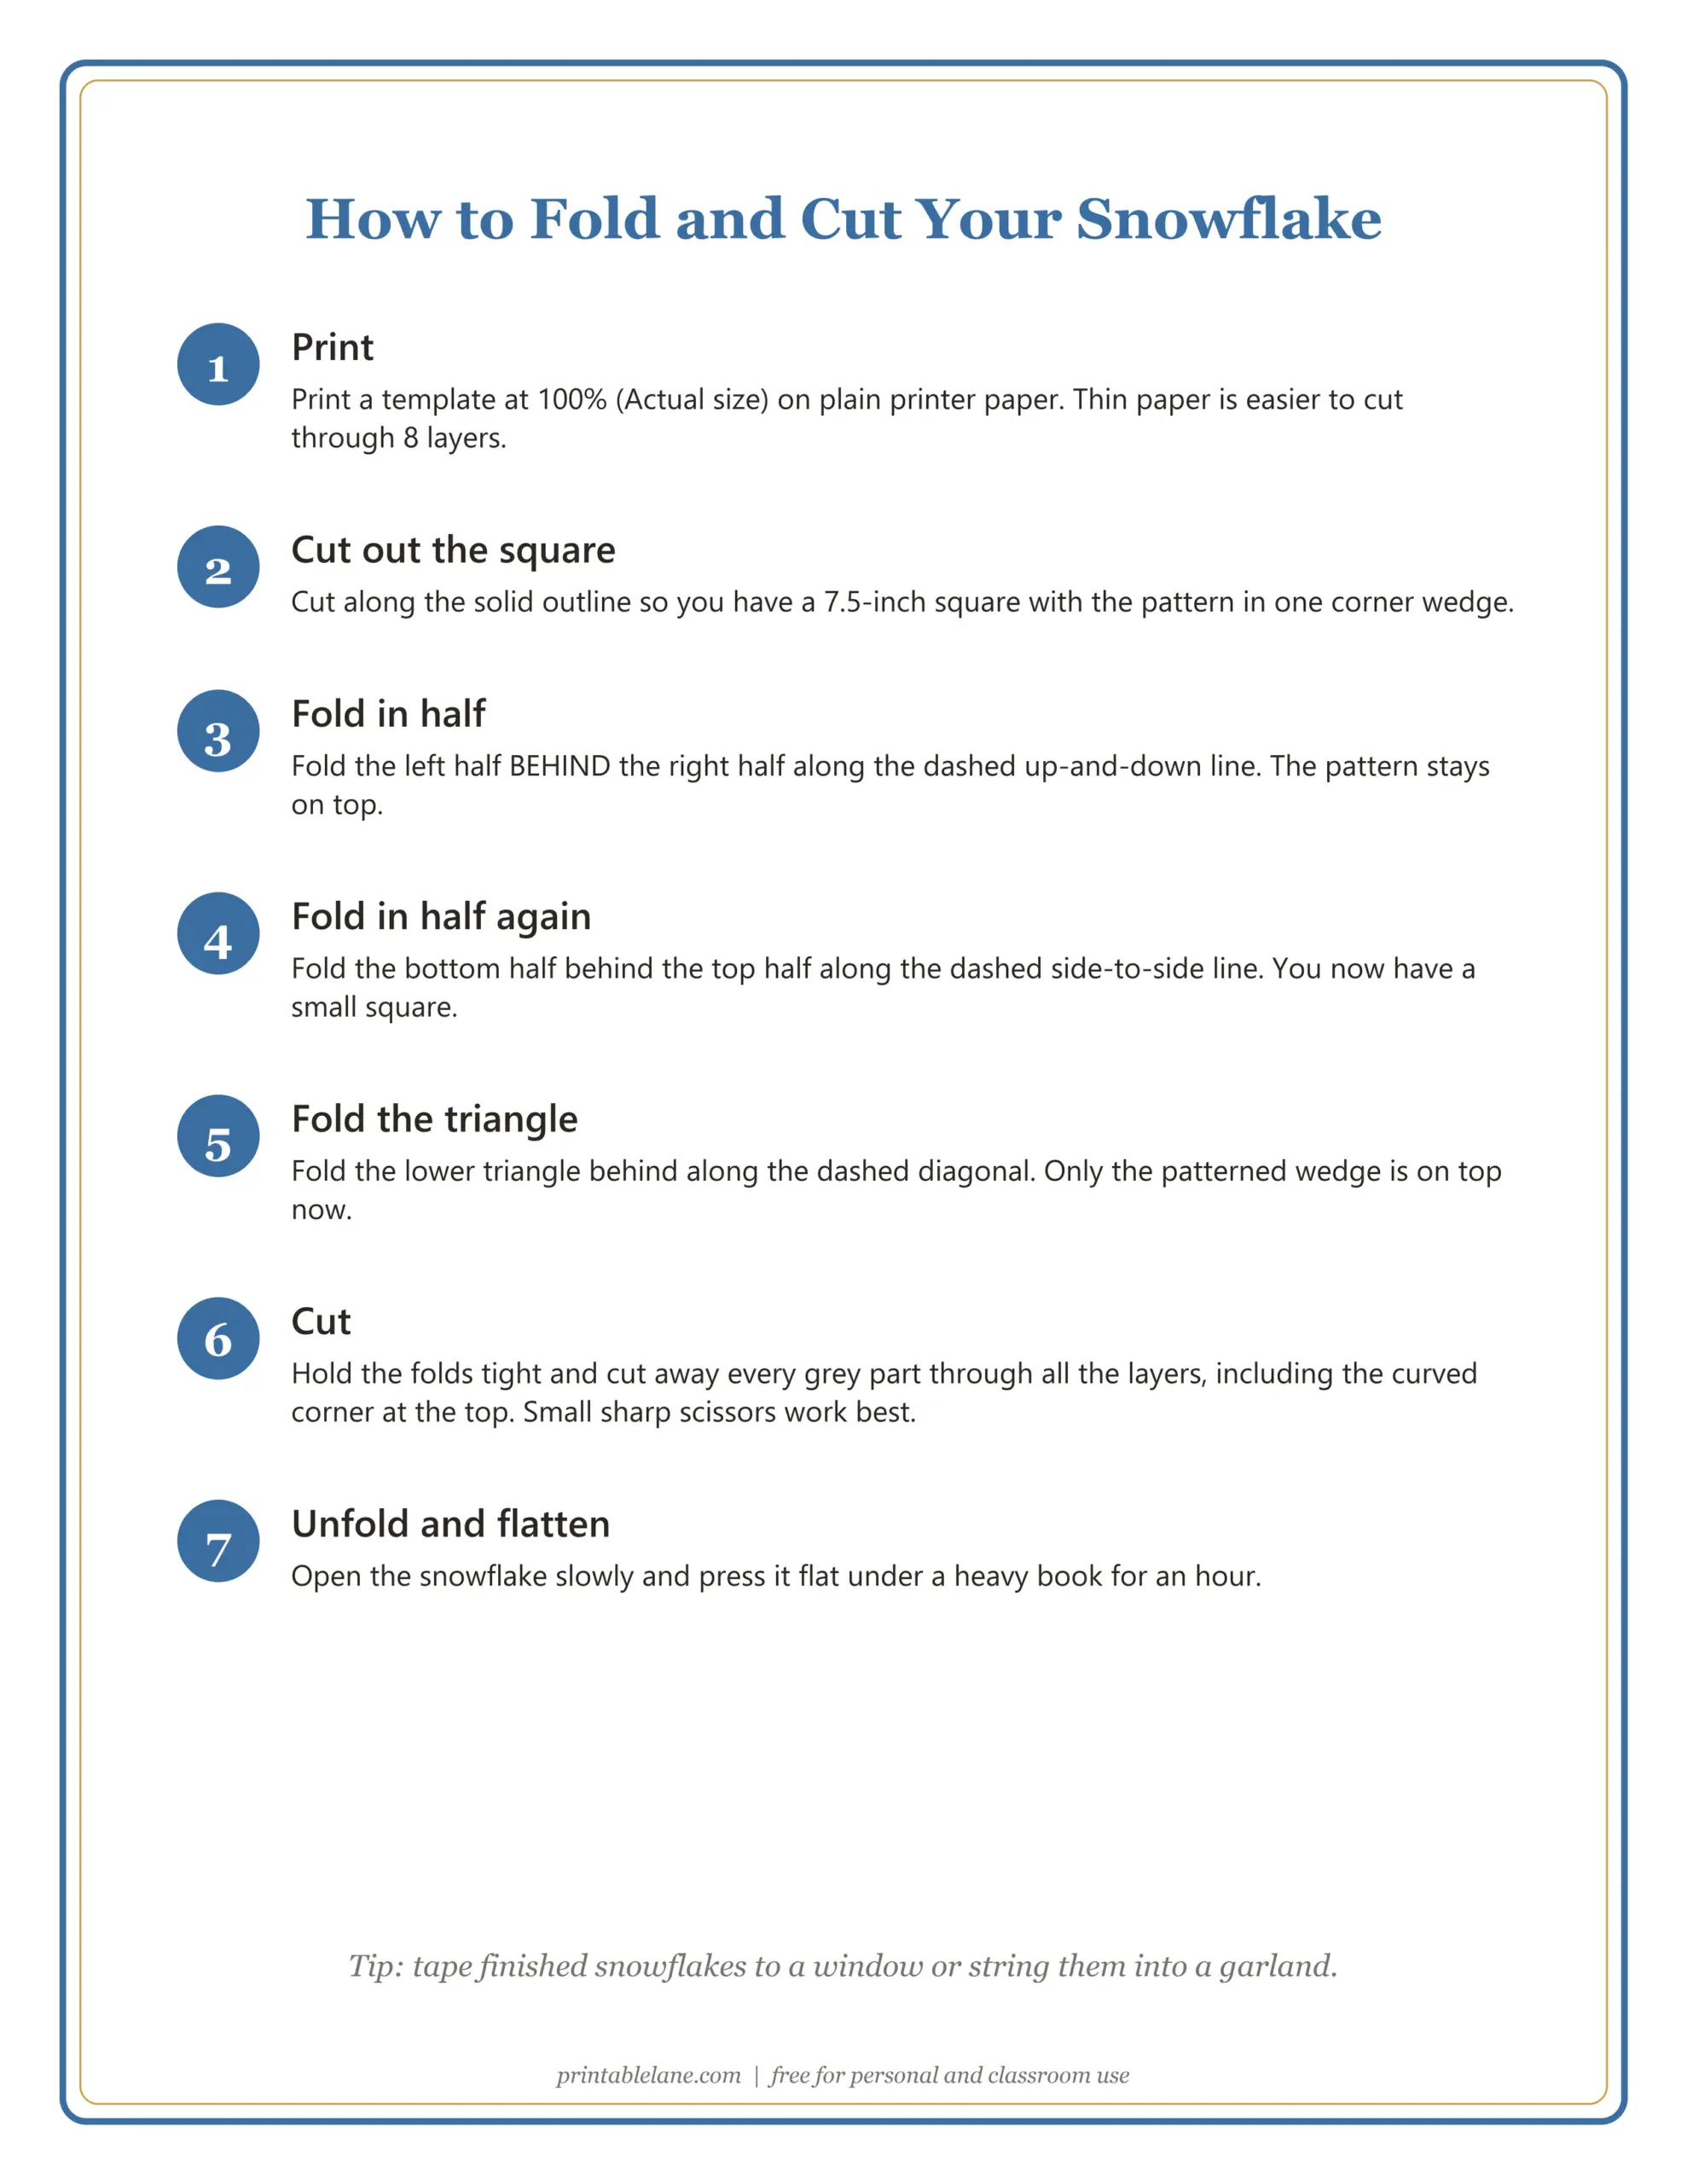
- How to fold and cut: seven short, numbered steps.
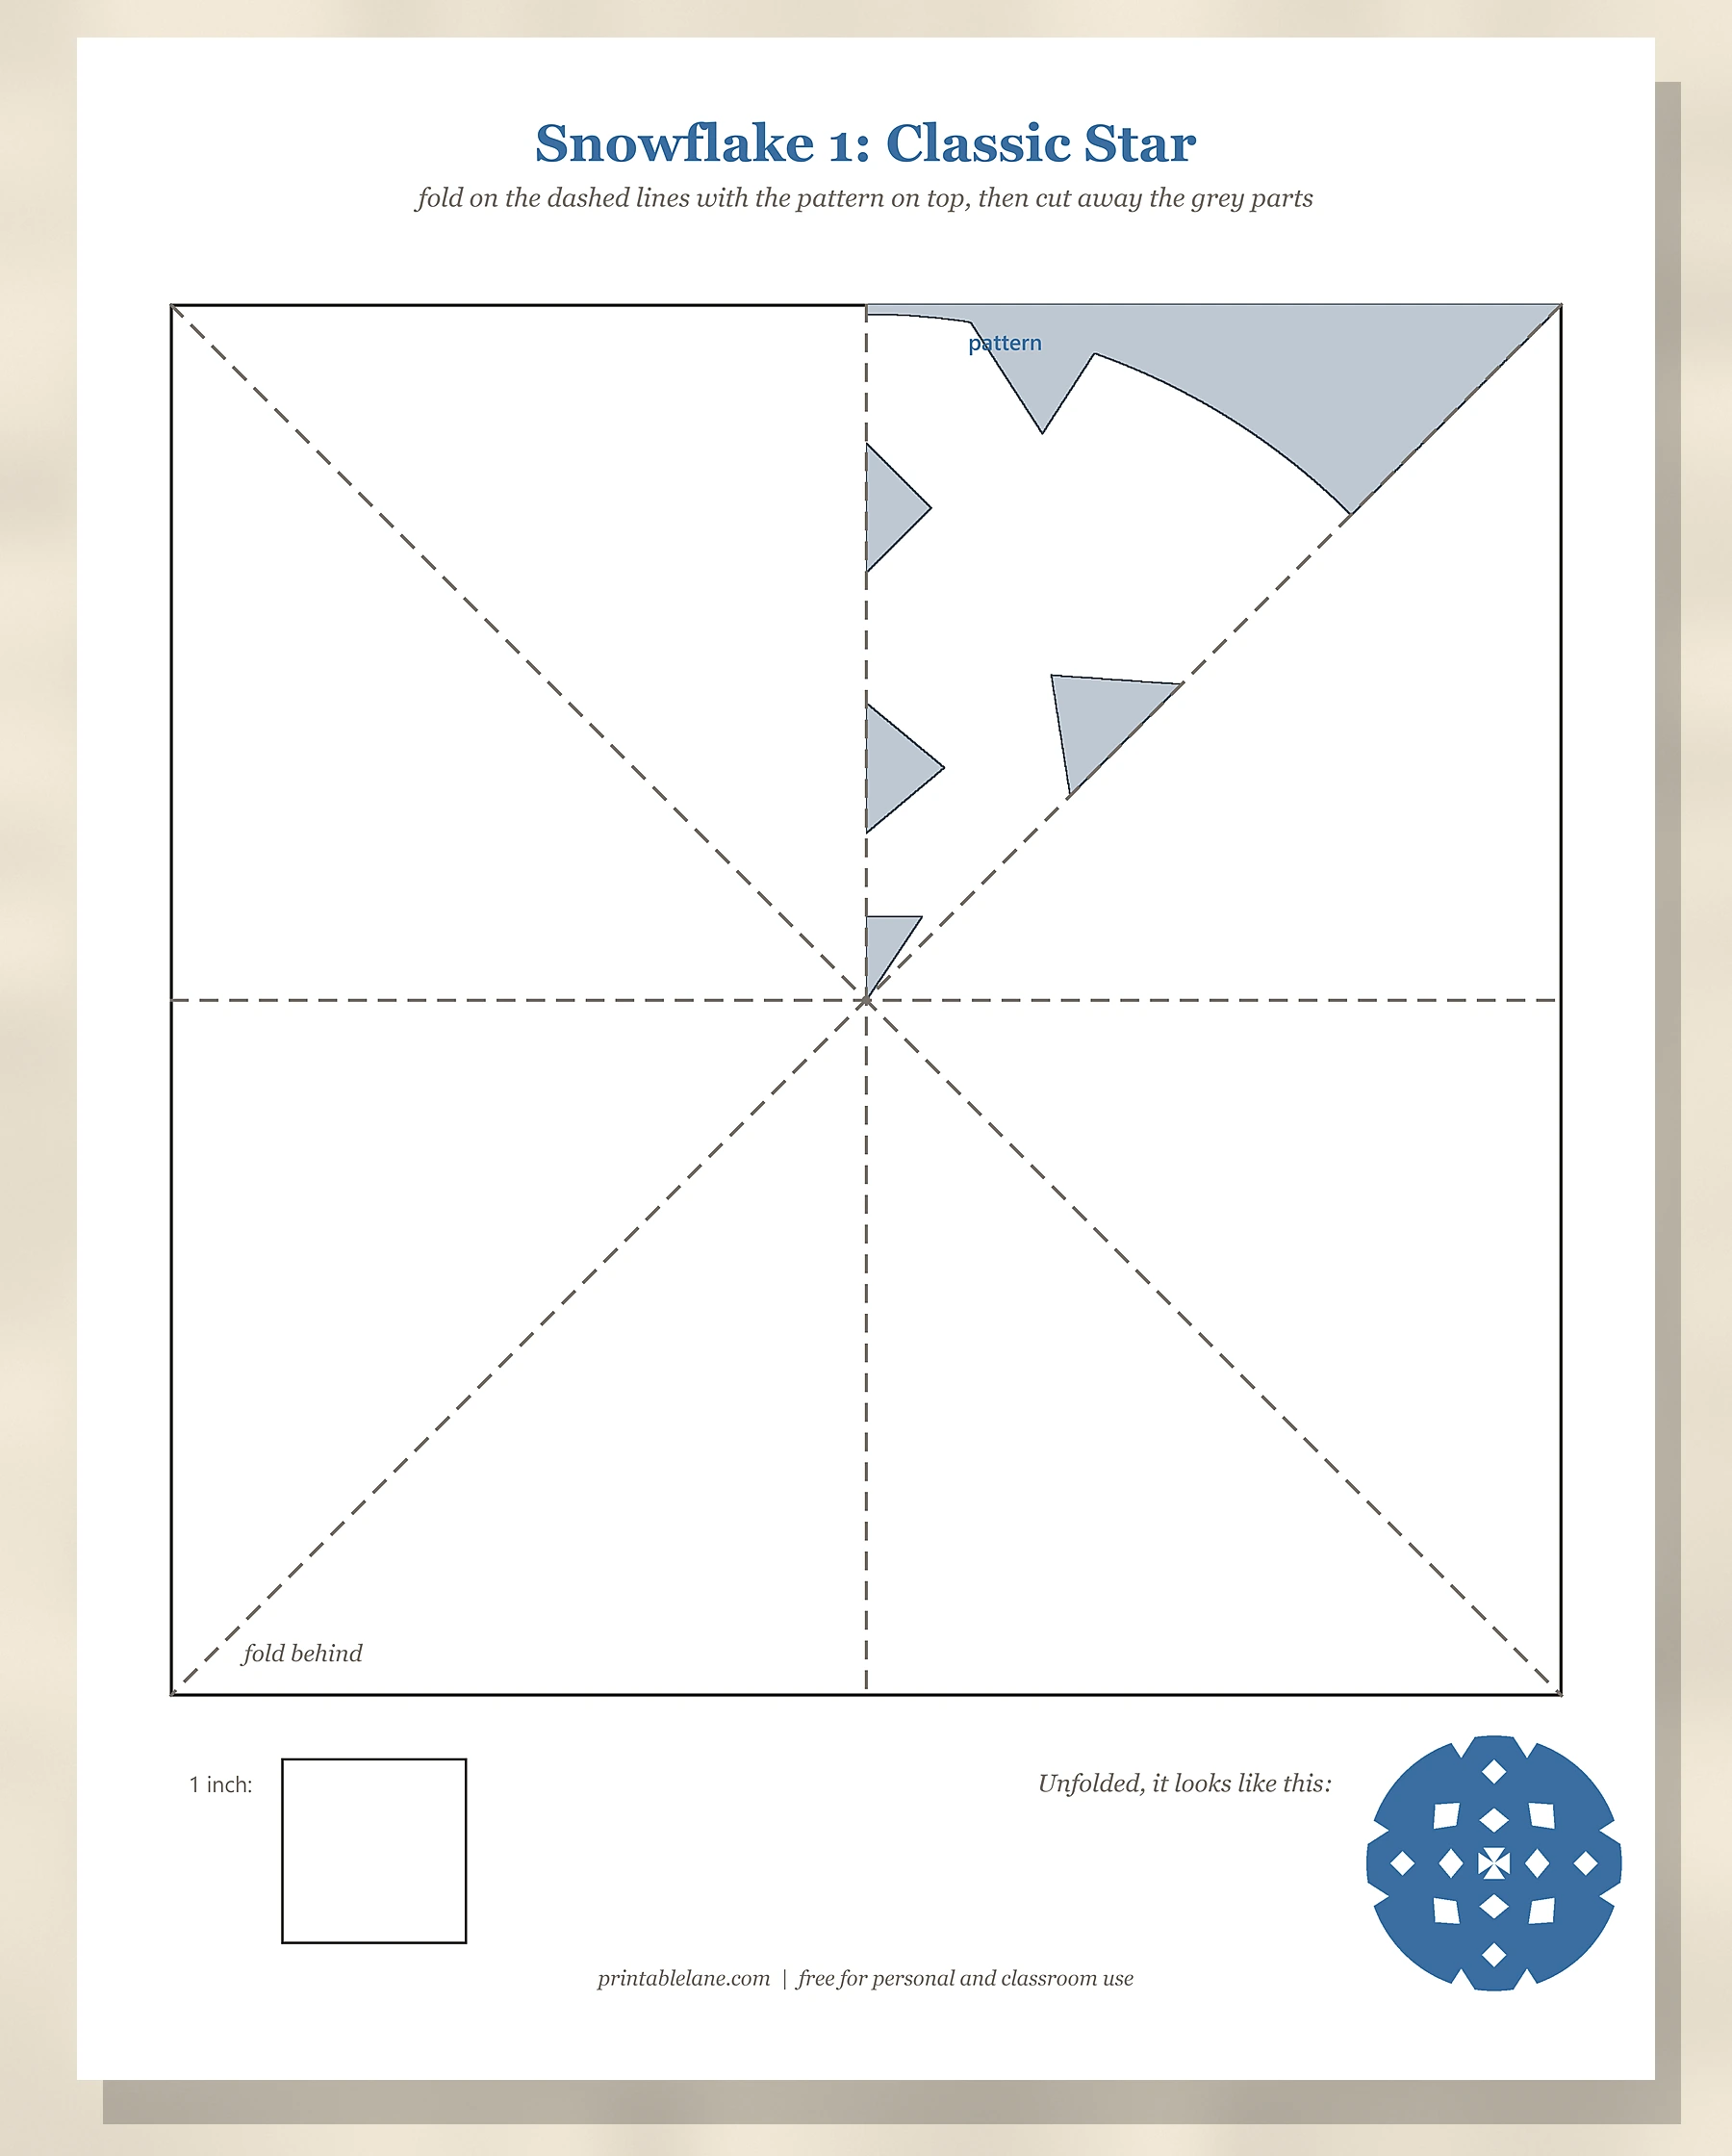
- Six snowflake templates: each on its own page, with fold lines, the grey parts to cut and a preview of the result.
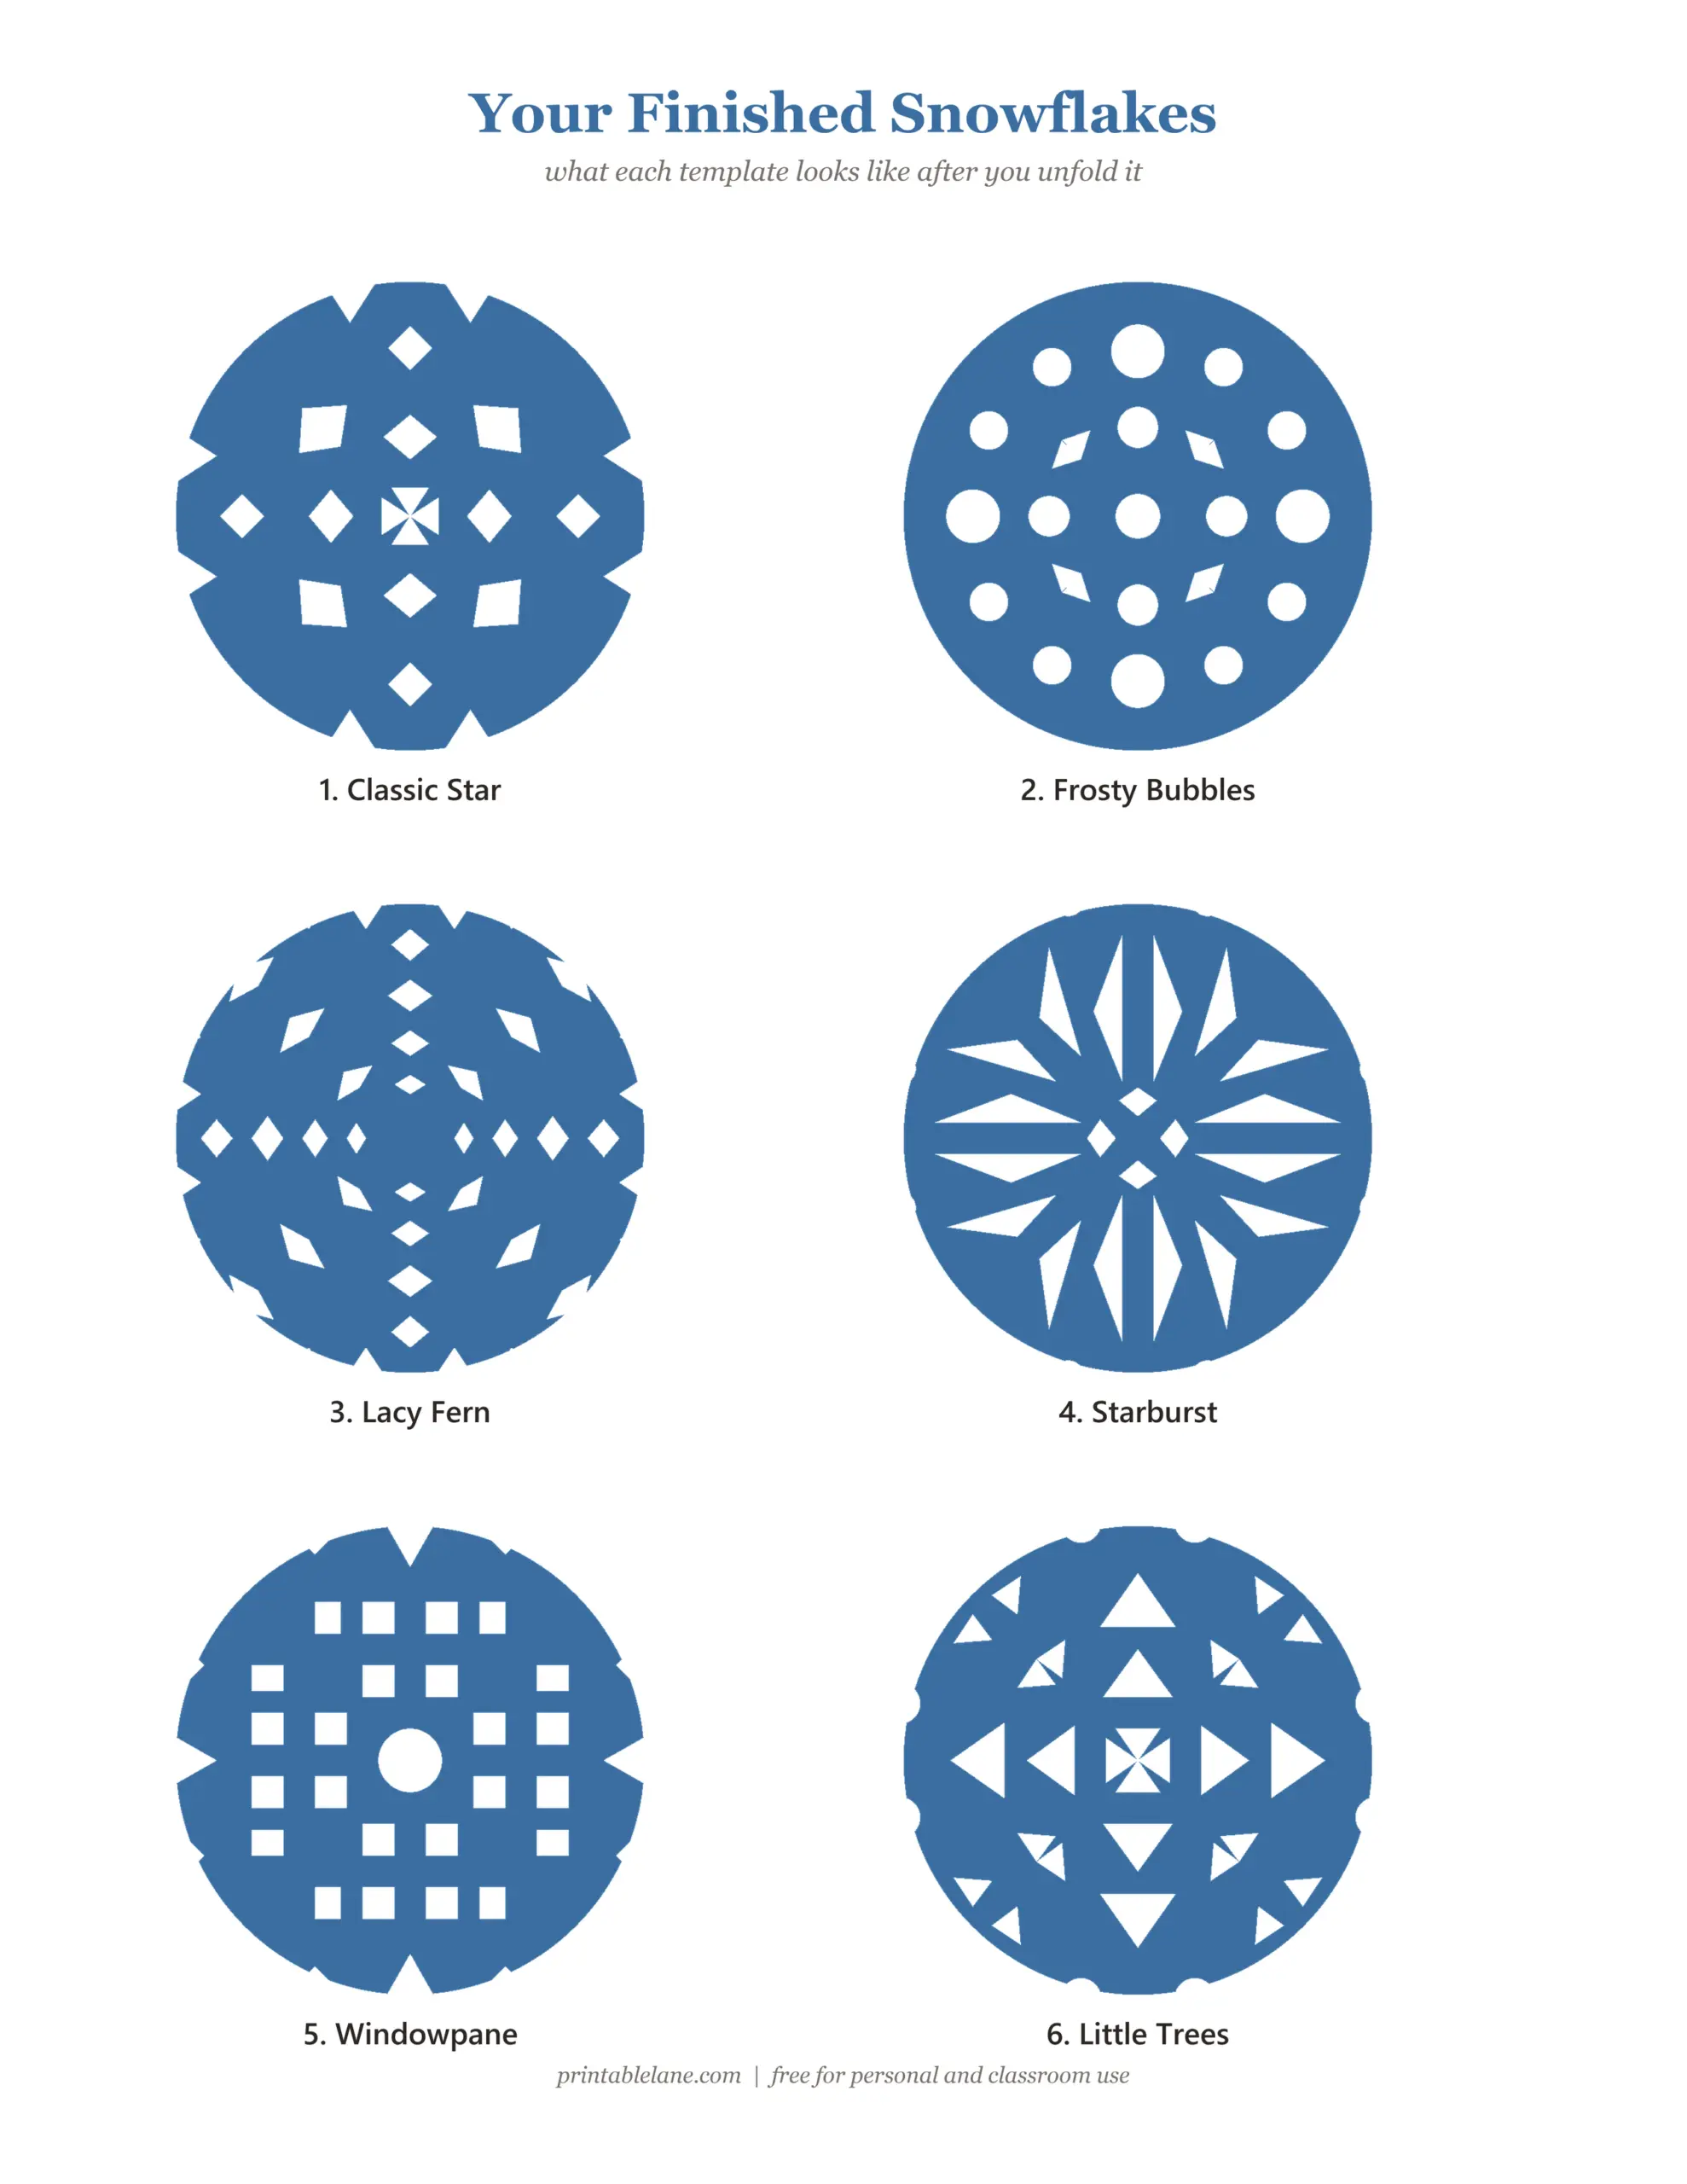
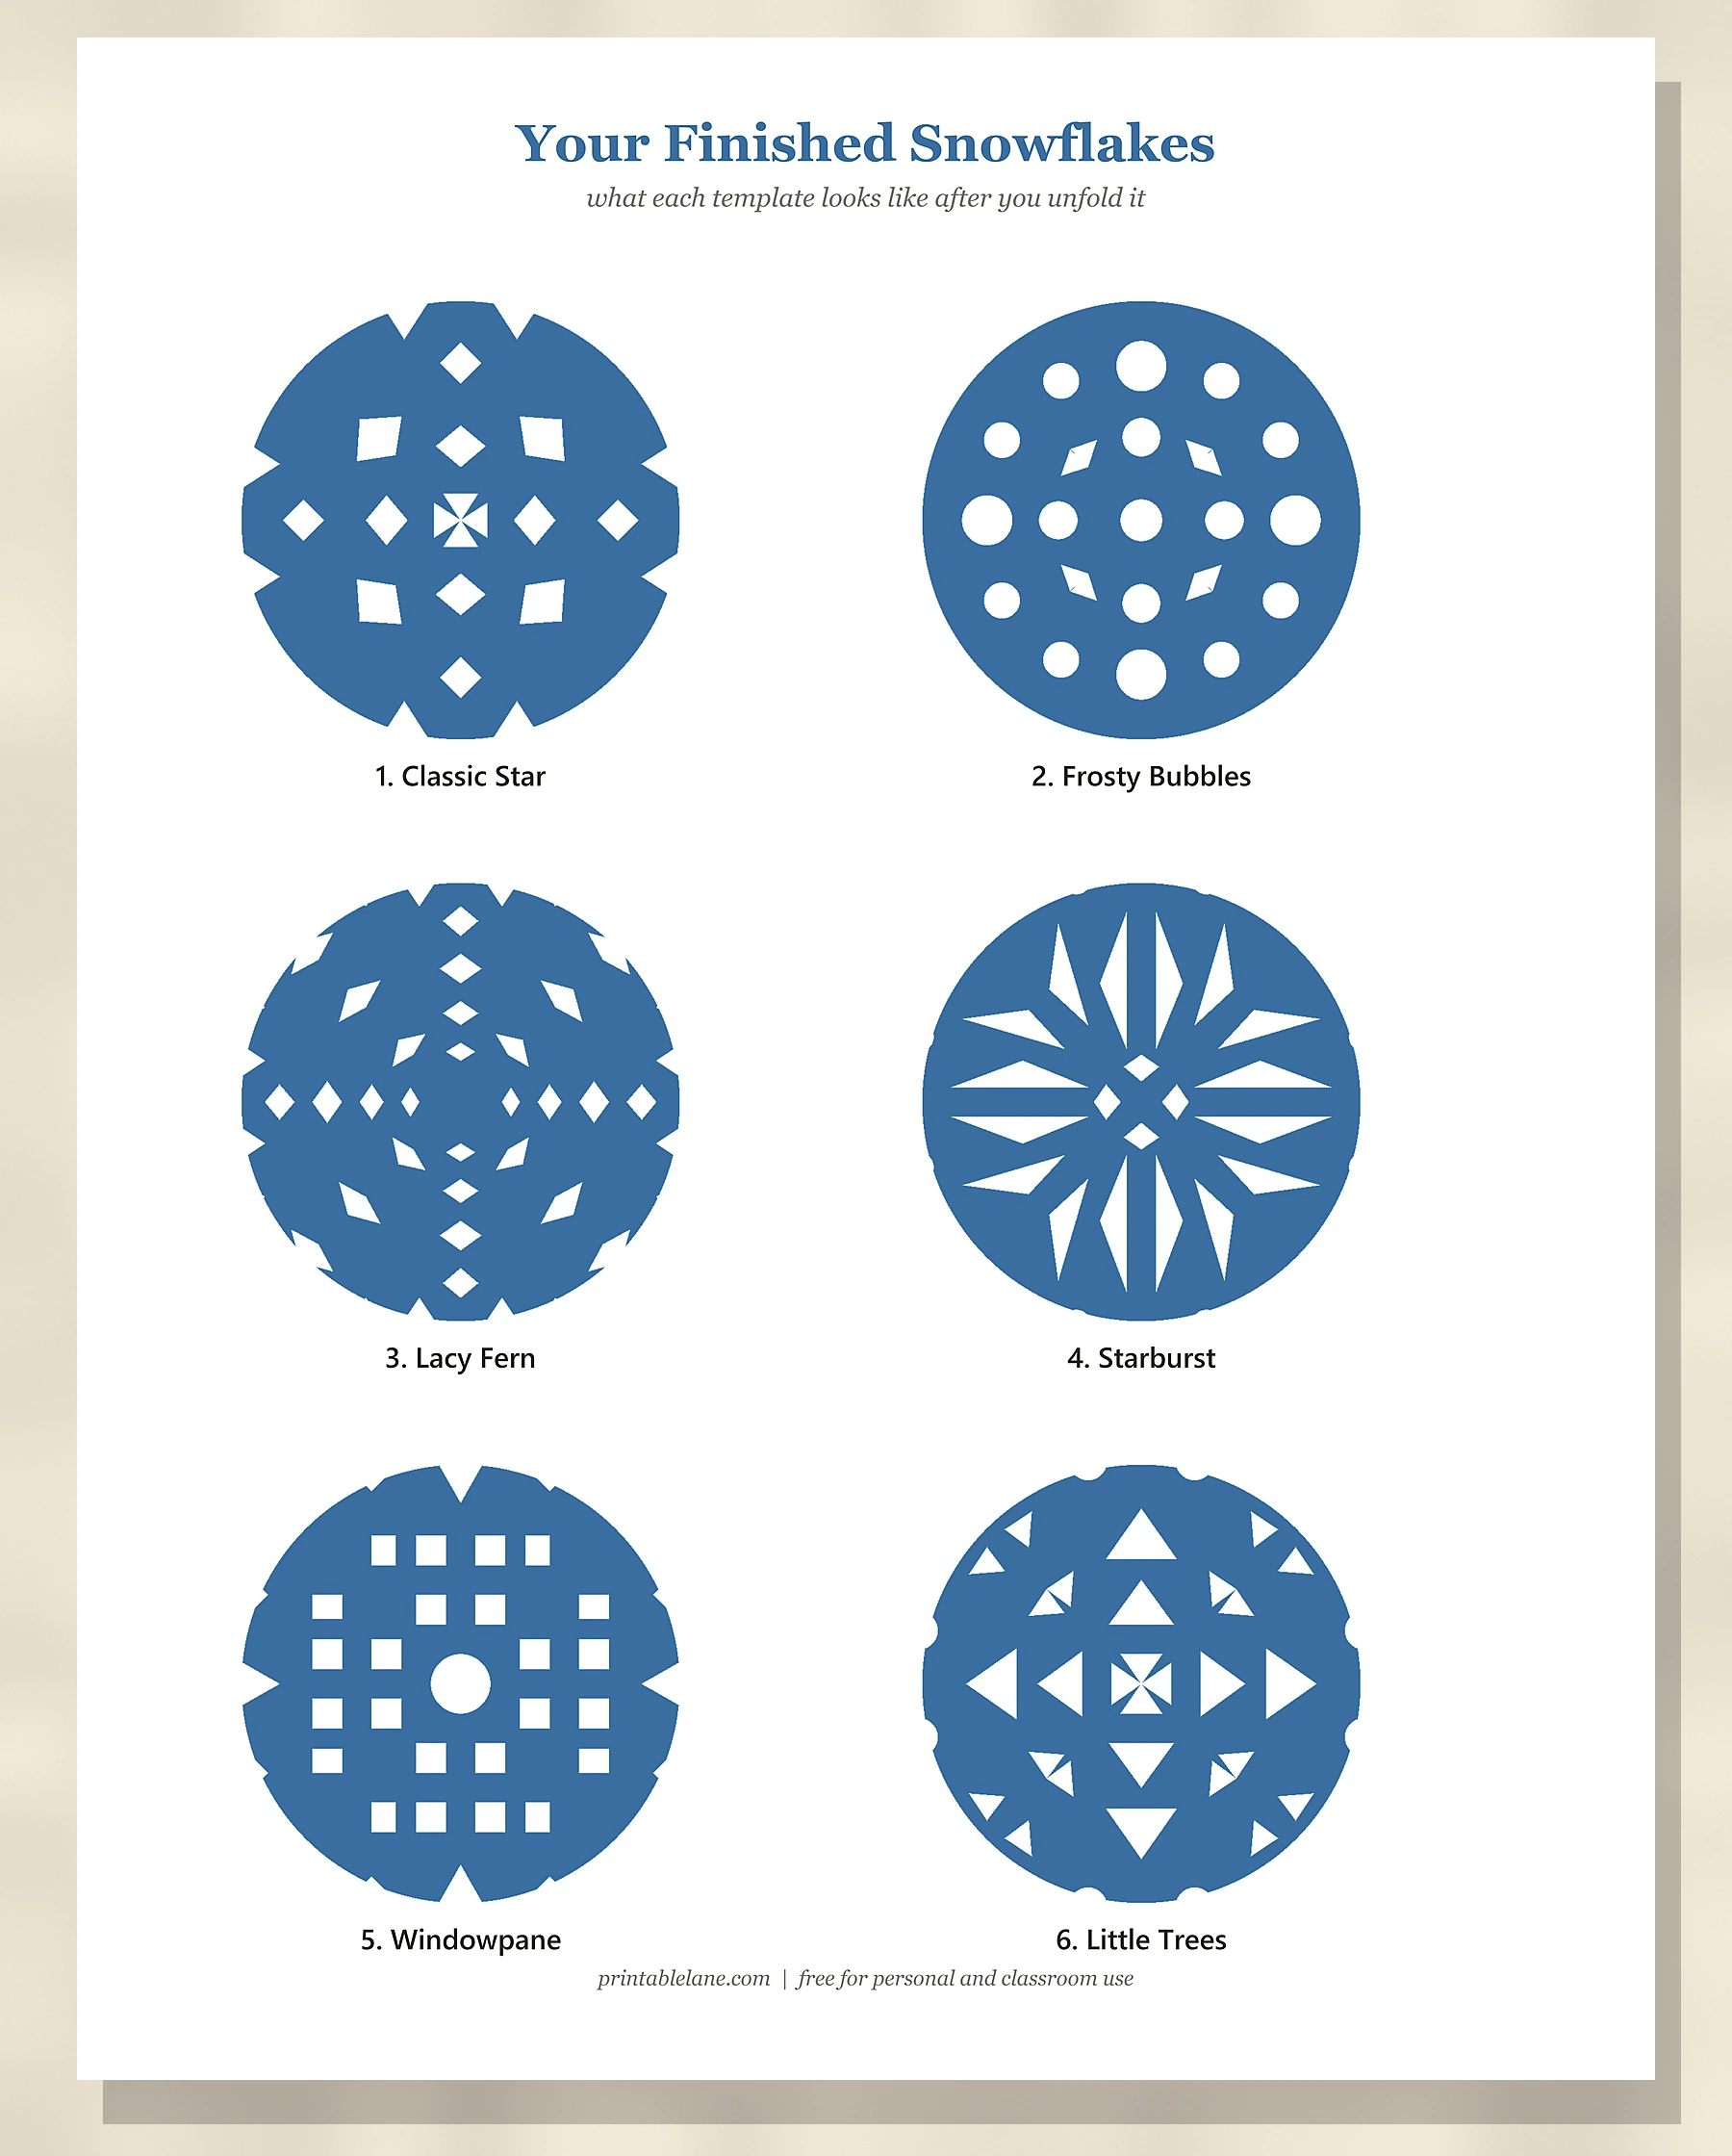
- Finished snowflakes page: all six designs after unfolding, so kids can pick one.
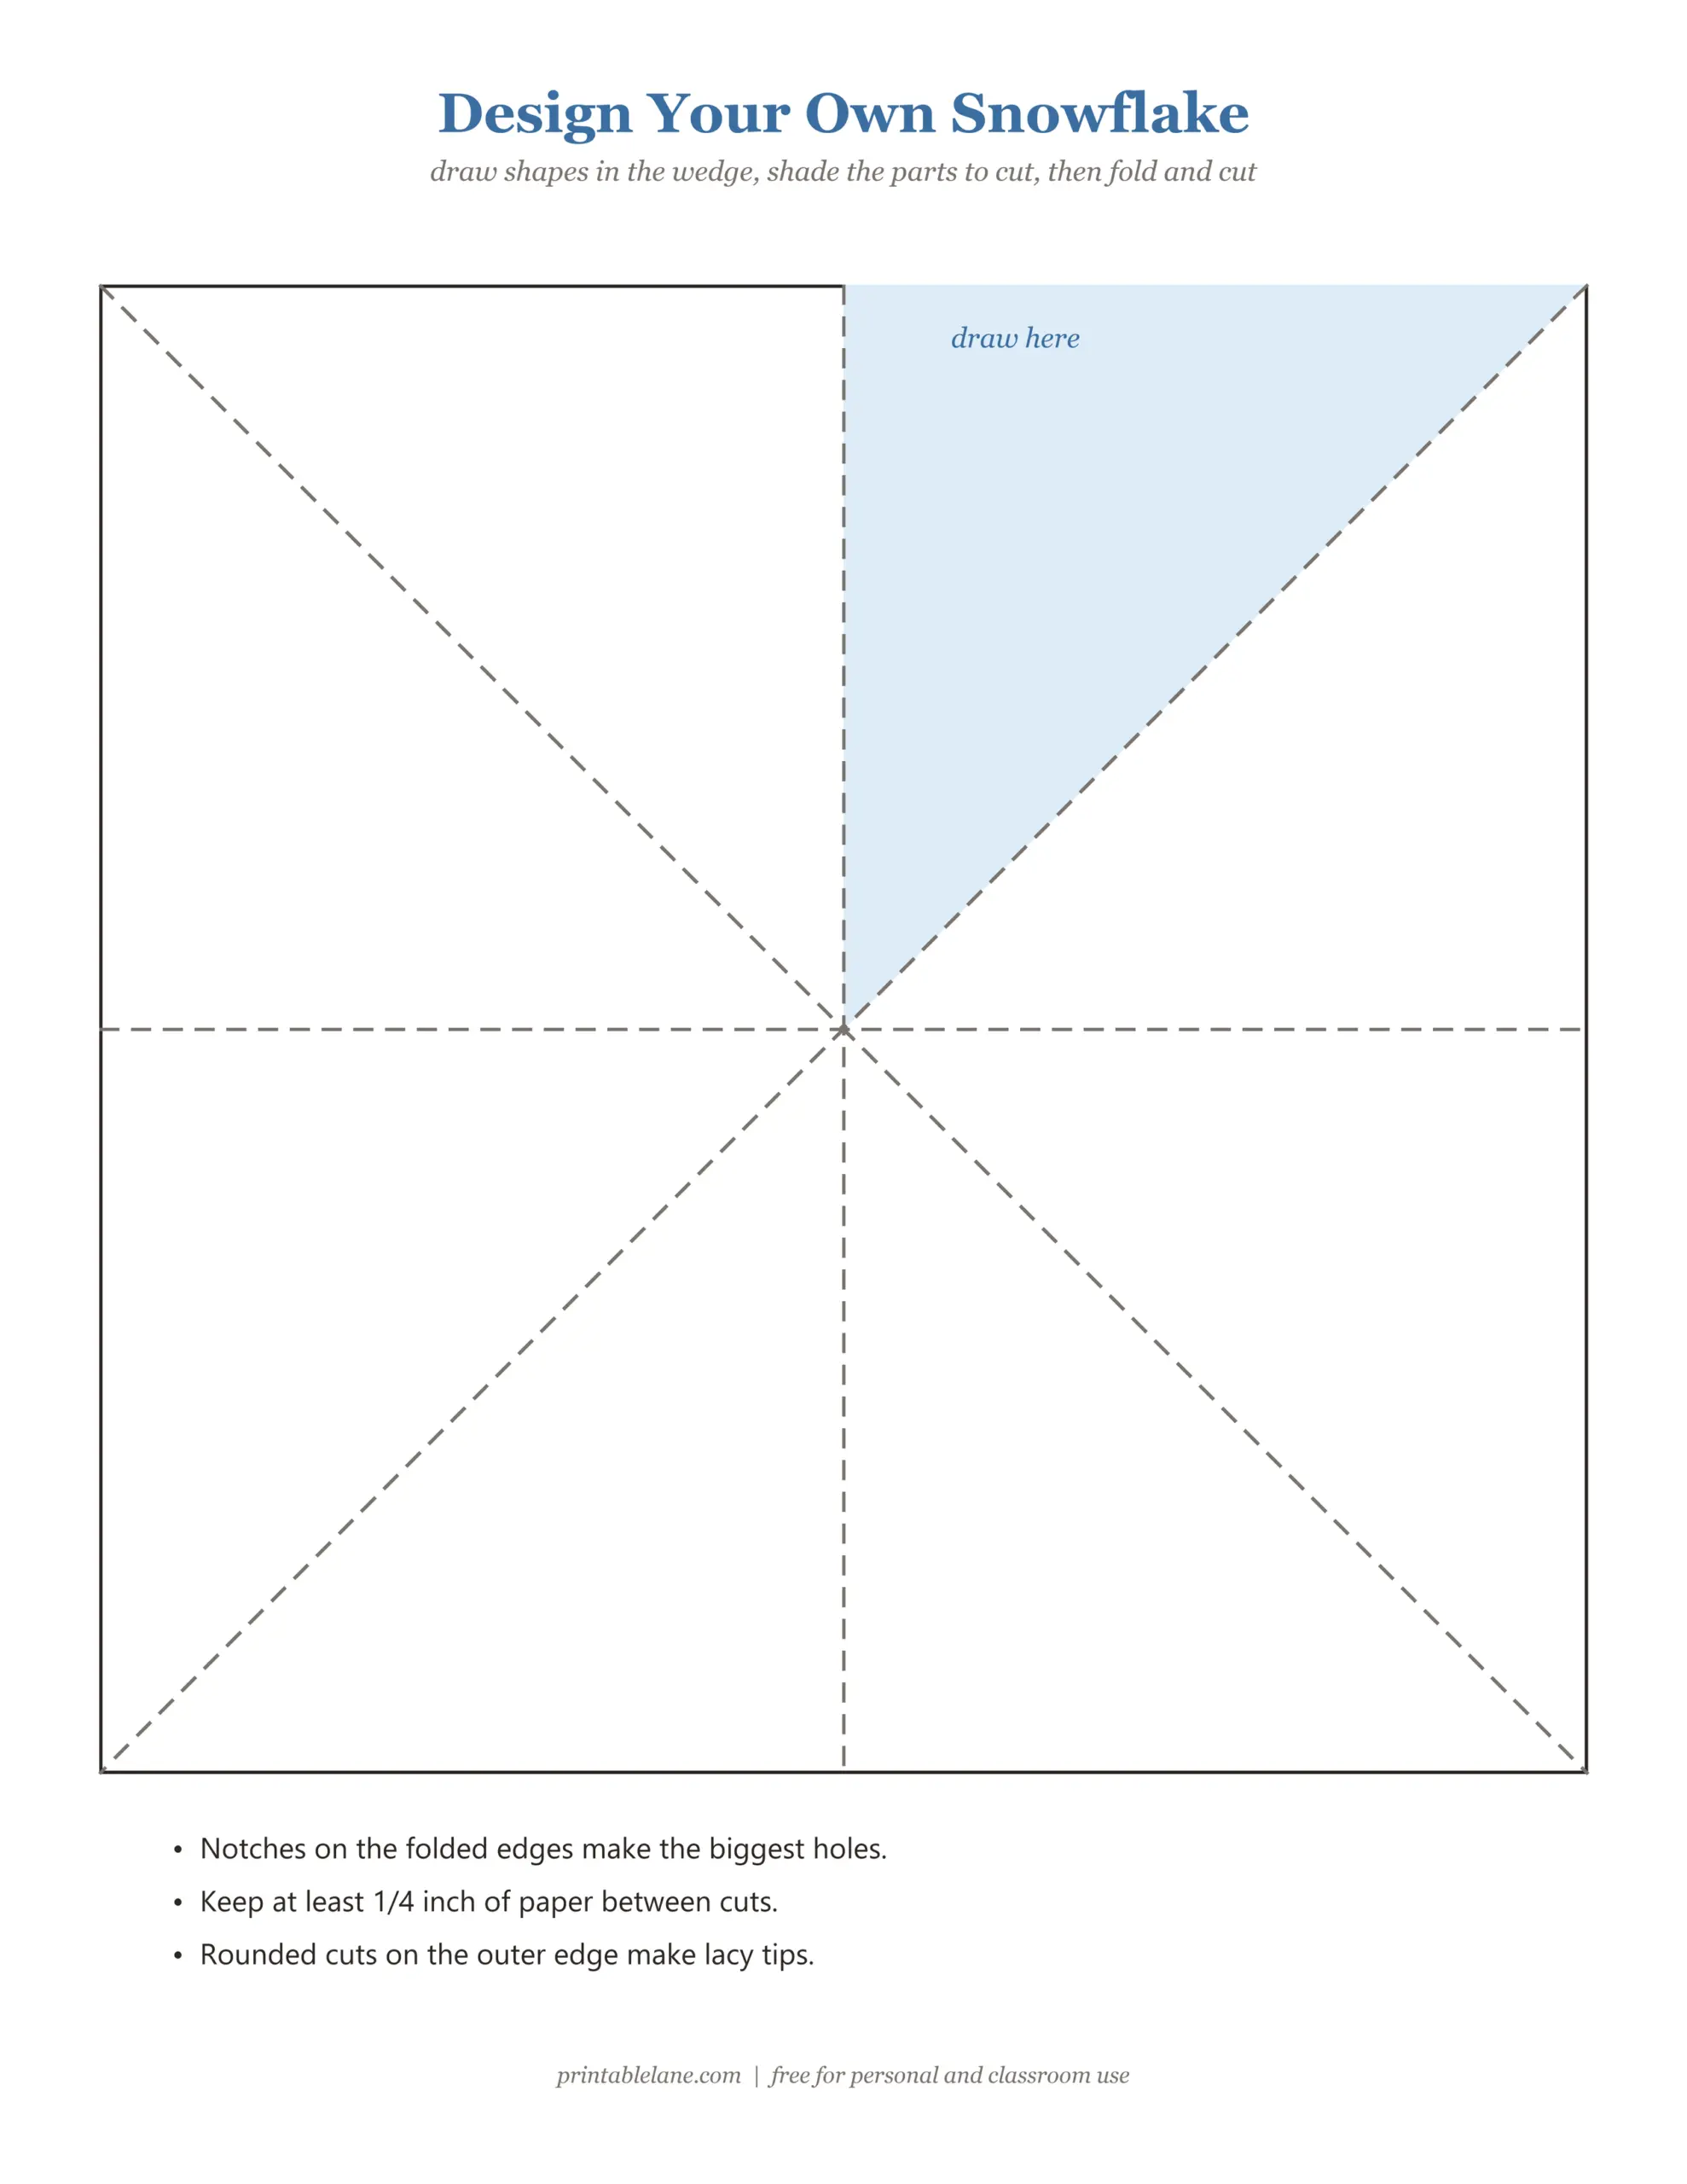
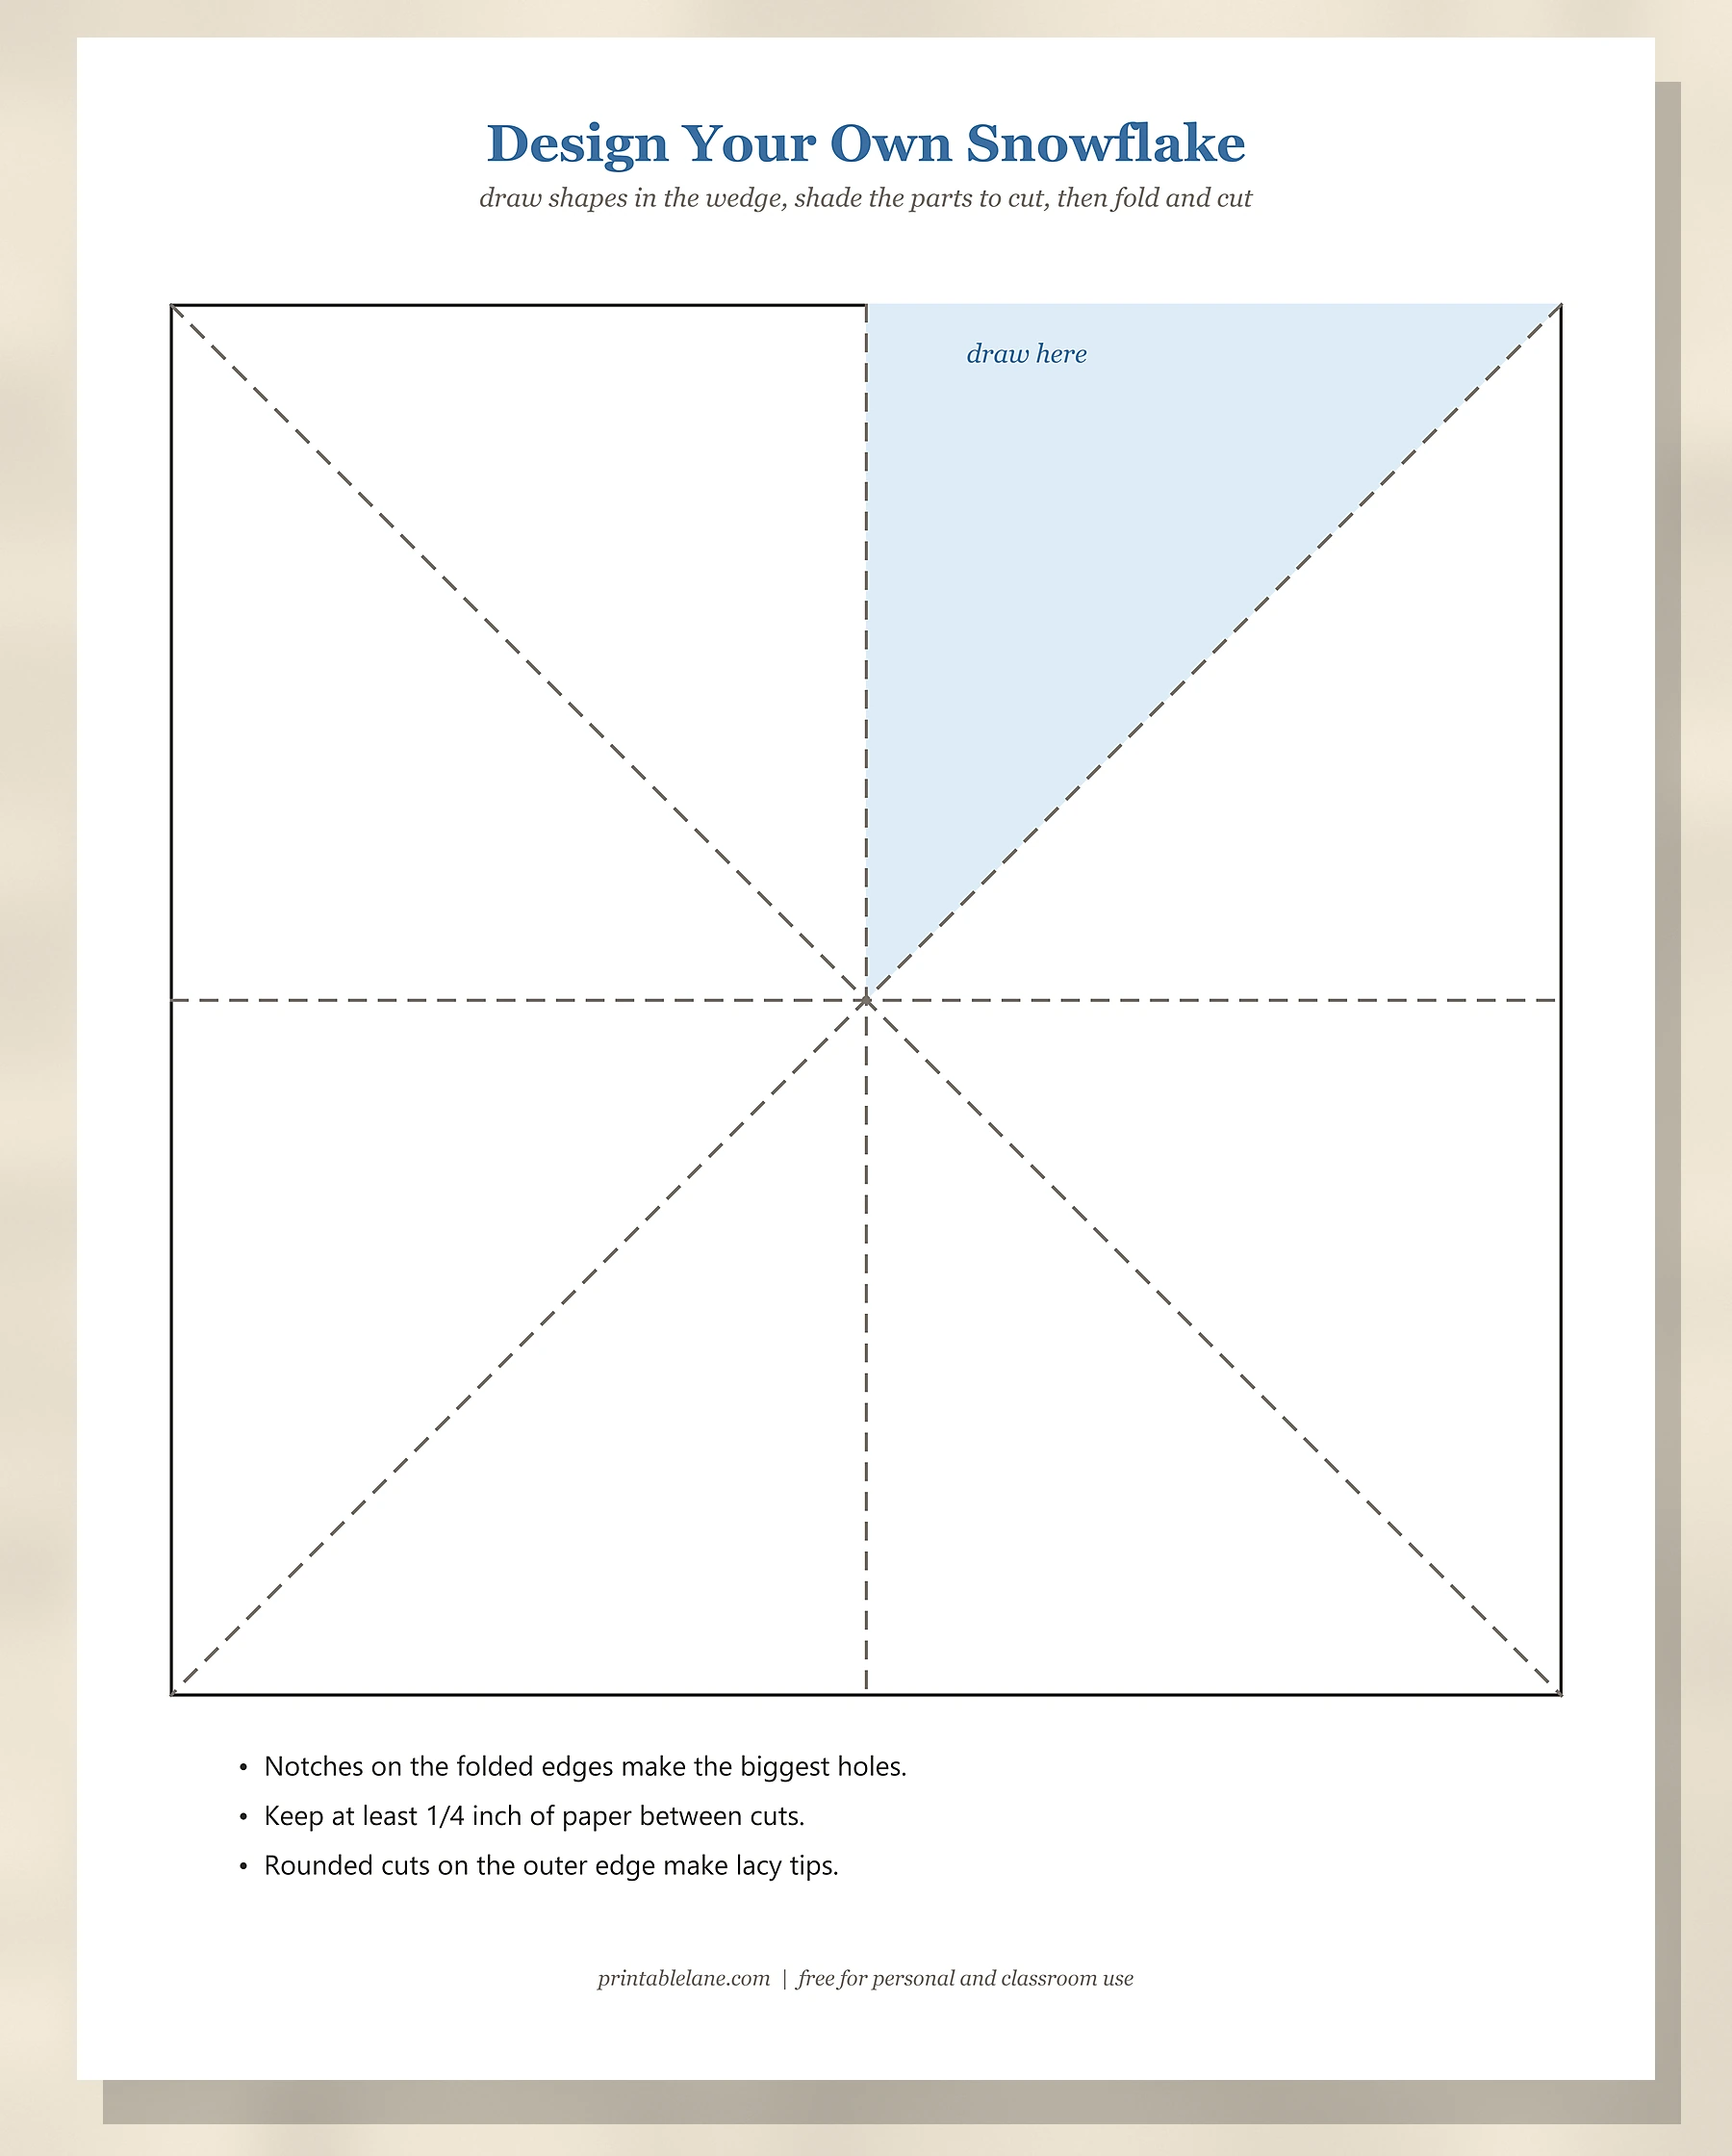
- Blank template: the same fold lines with an empty wedge to draw your own pattern.
- A cover page and a 1-inch check square on every template.
How these templates work
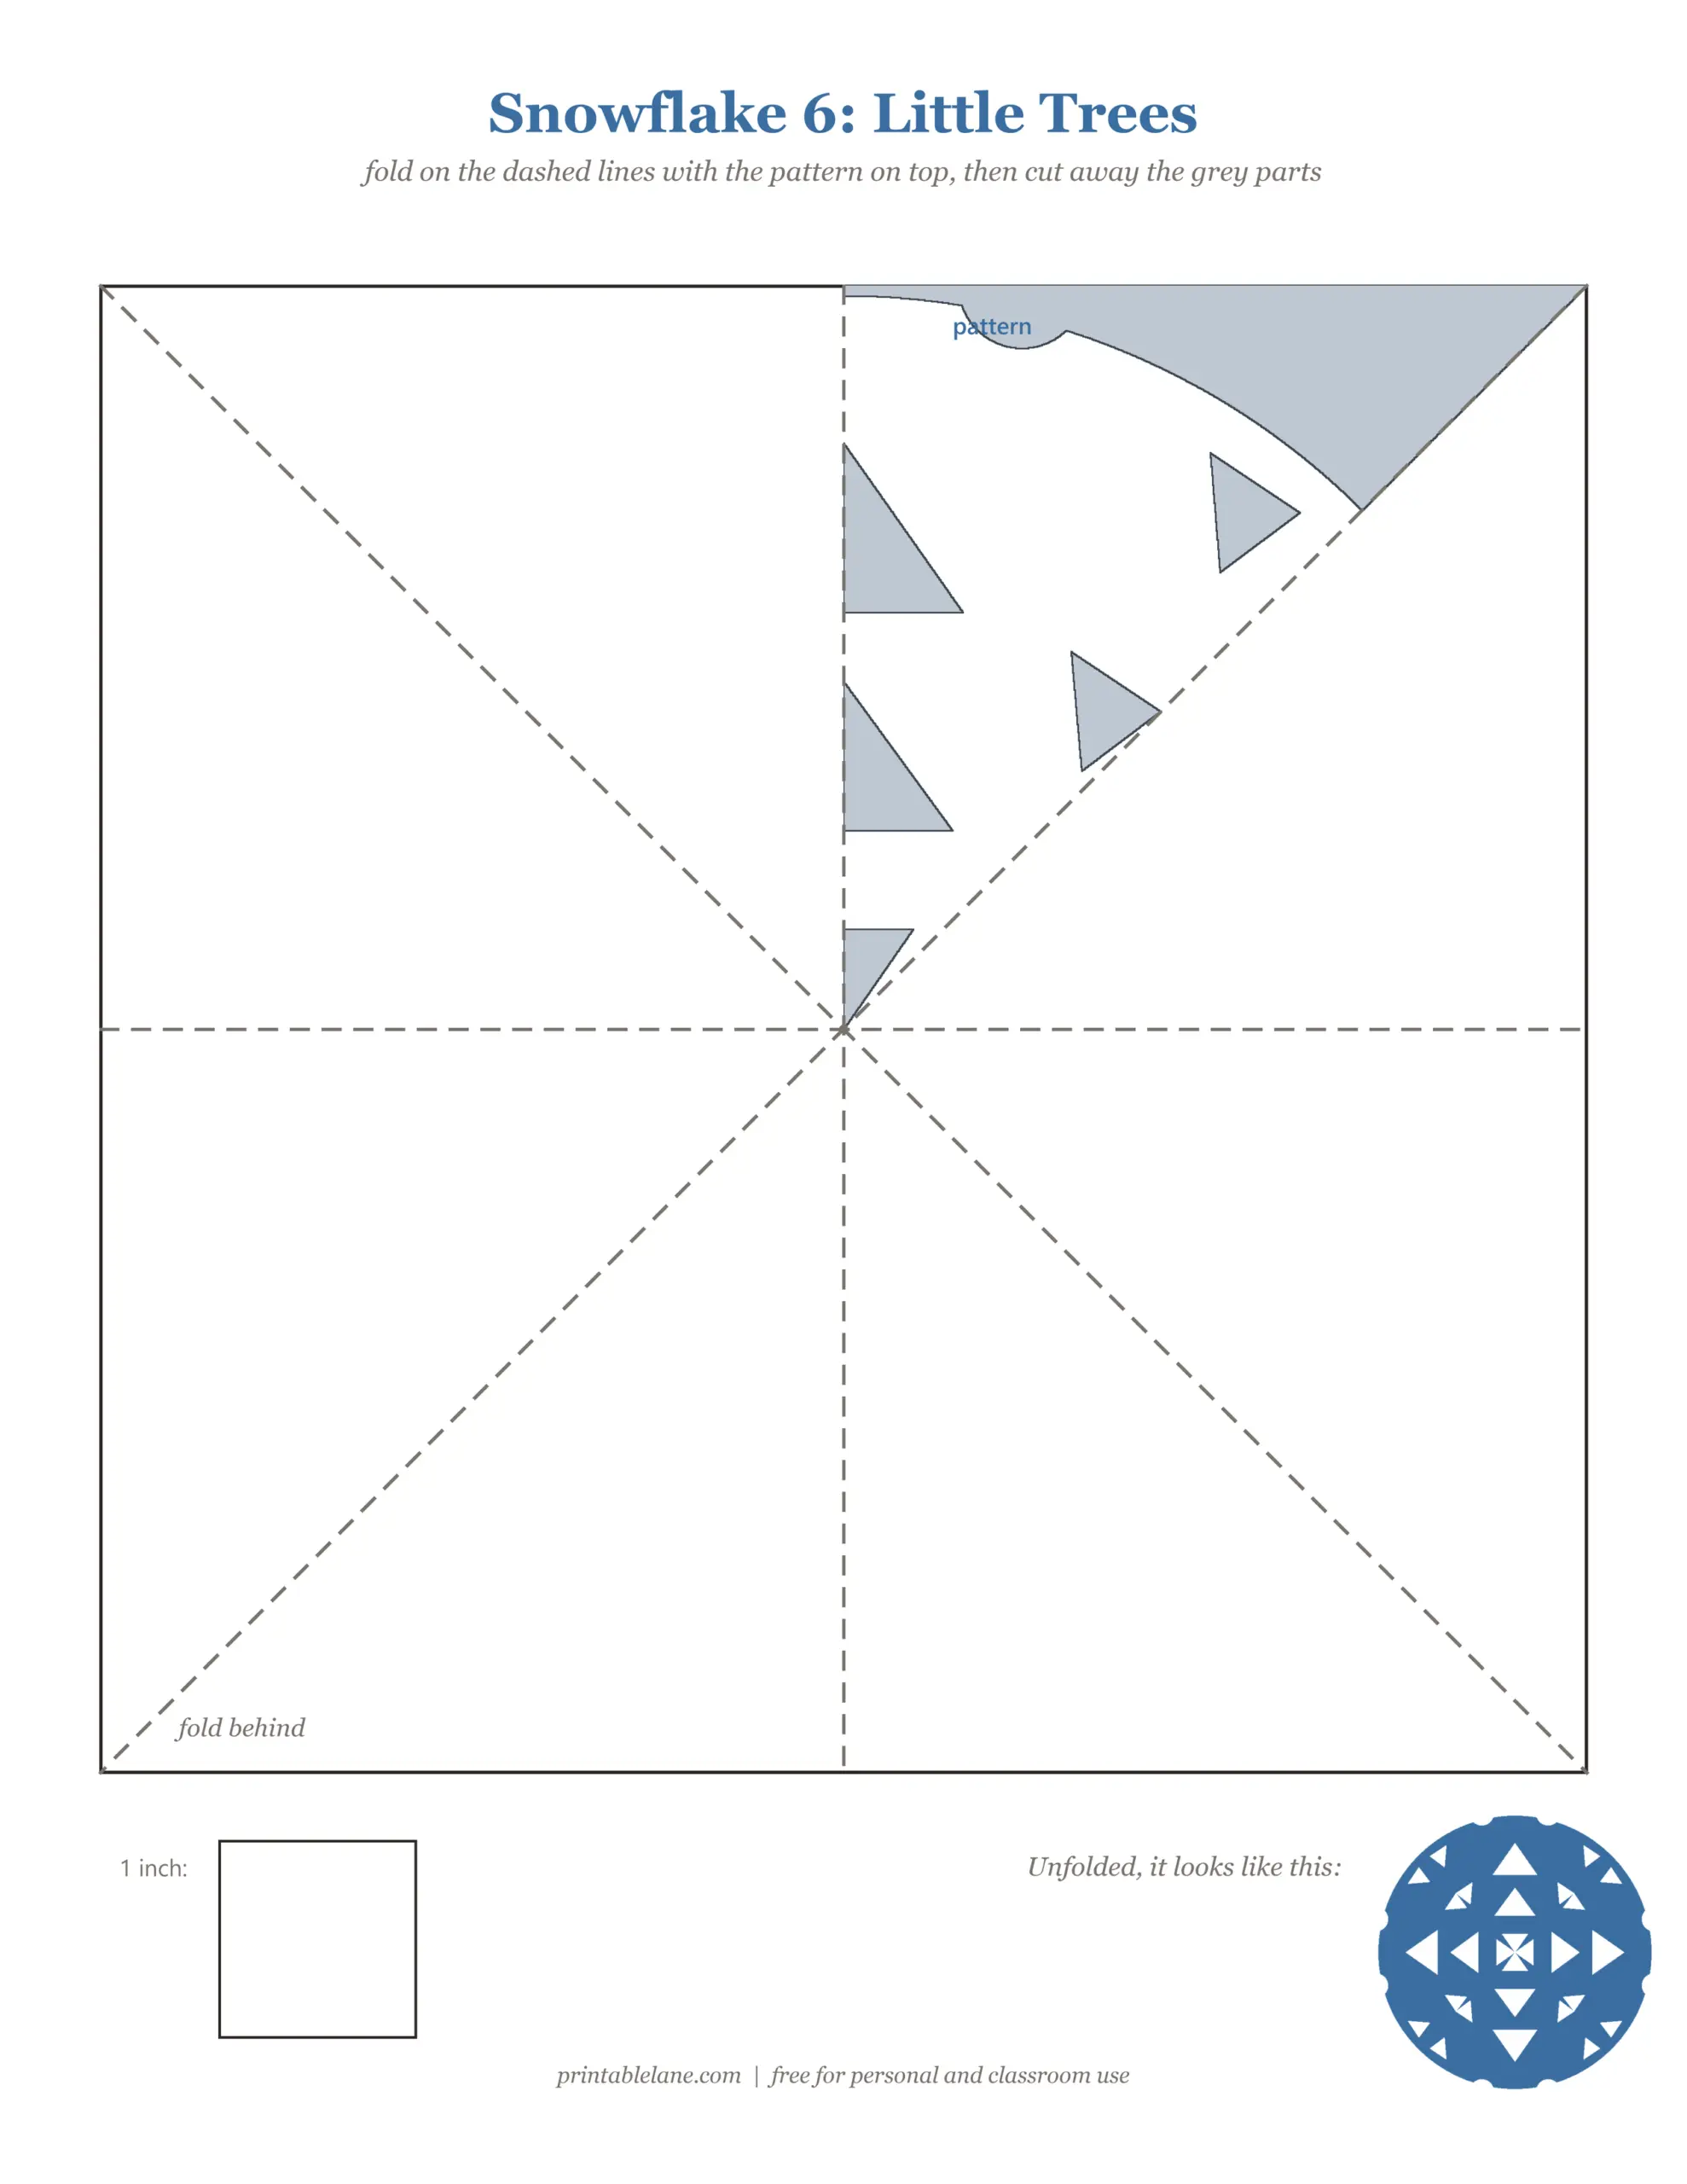
Each template is a 7.5-inch square with four dashed fold lines. The pattern is printed in only one wedge of the square. When you fold the rest of the paper behind that wedge, you stack eight layers, and every cut goes through all of them. That is why one small pattern turns into a big, symmetrical snowflake.
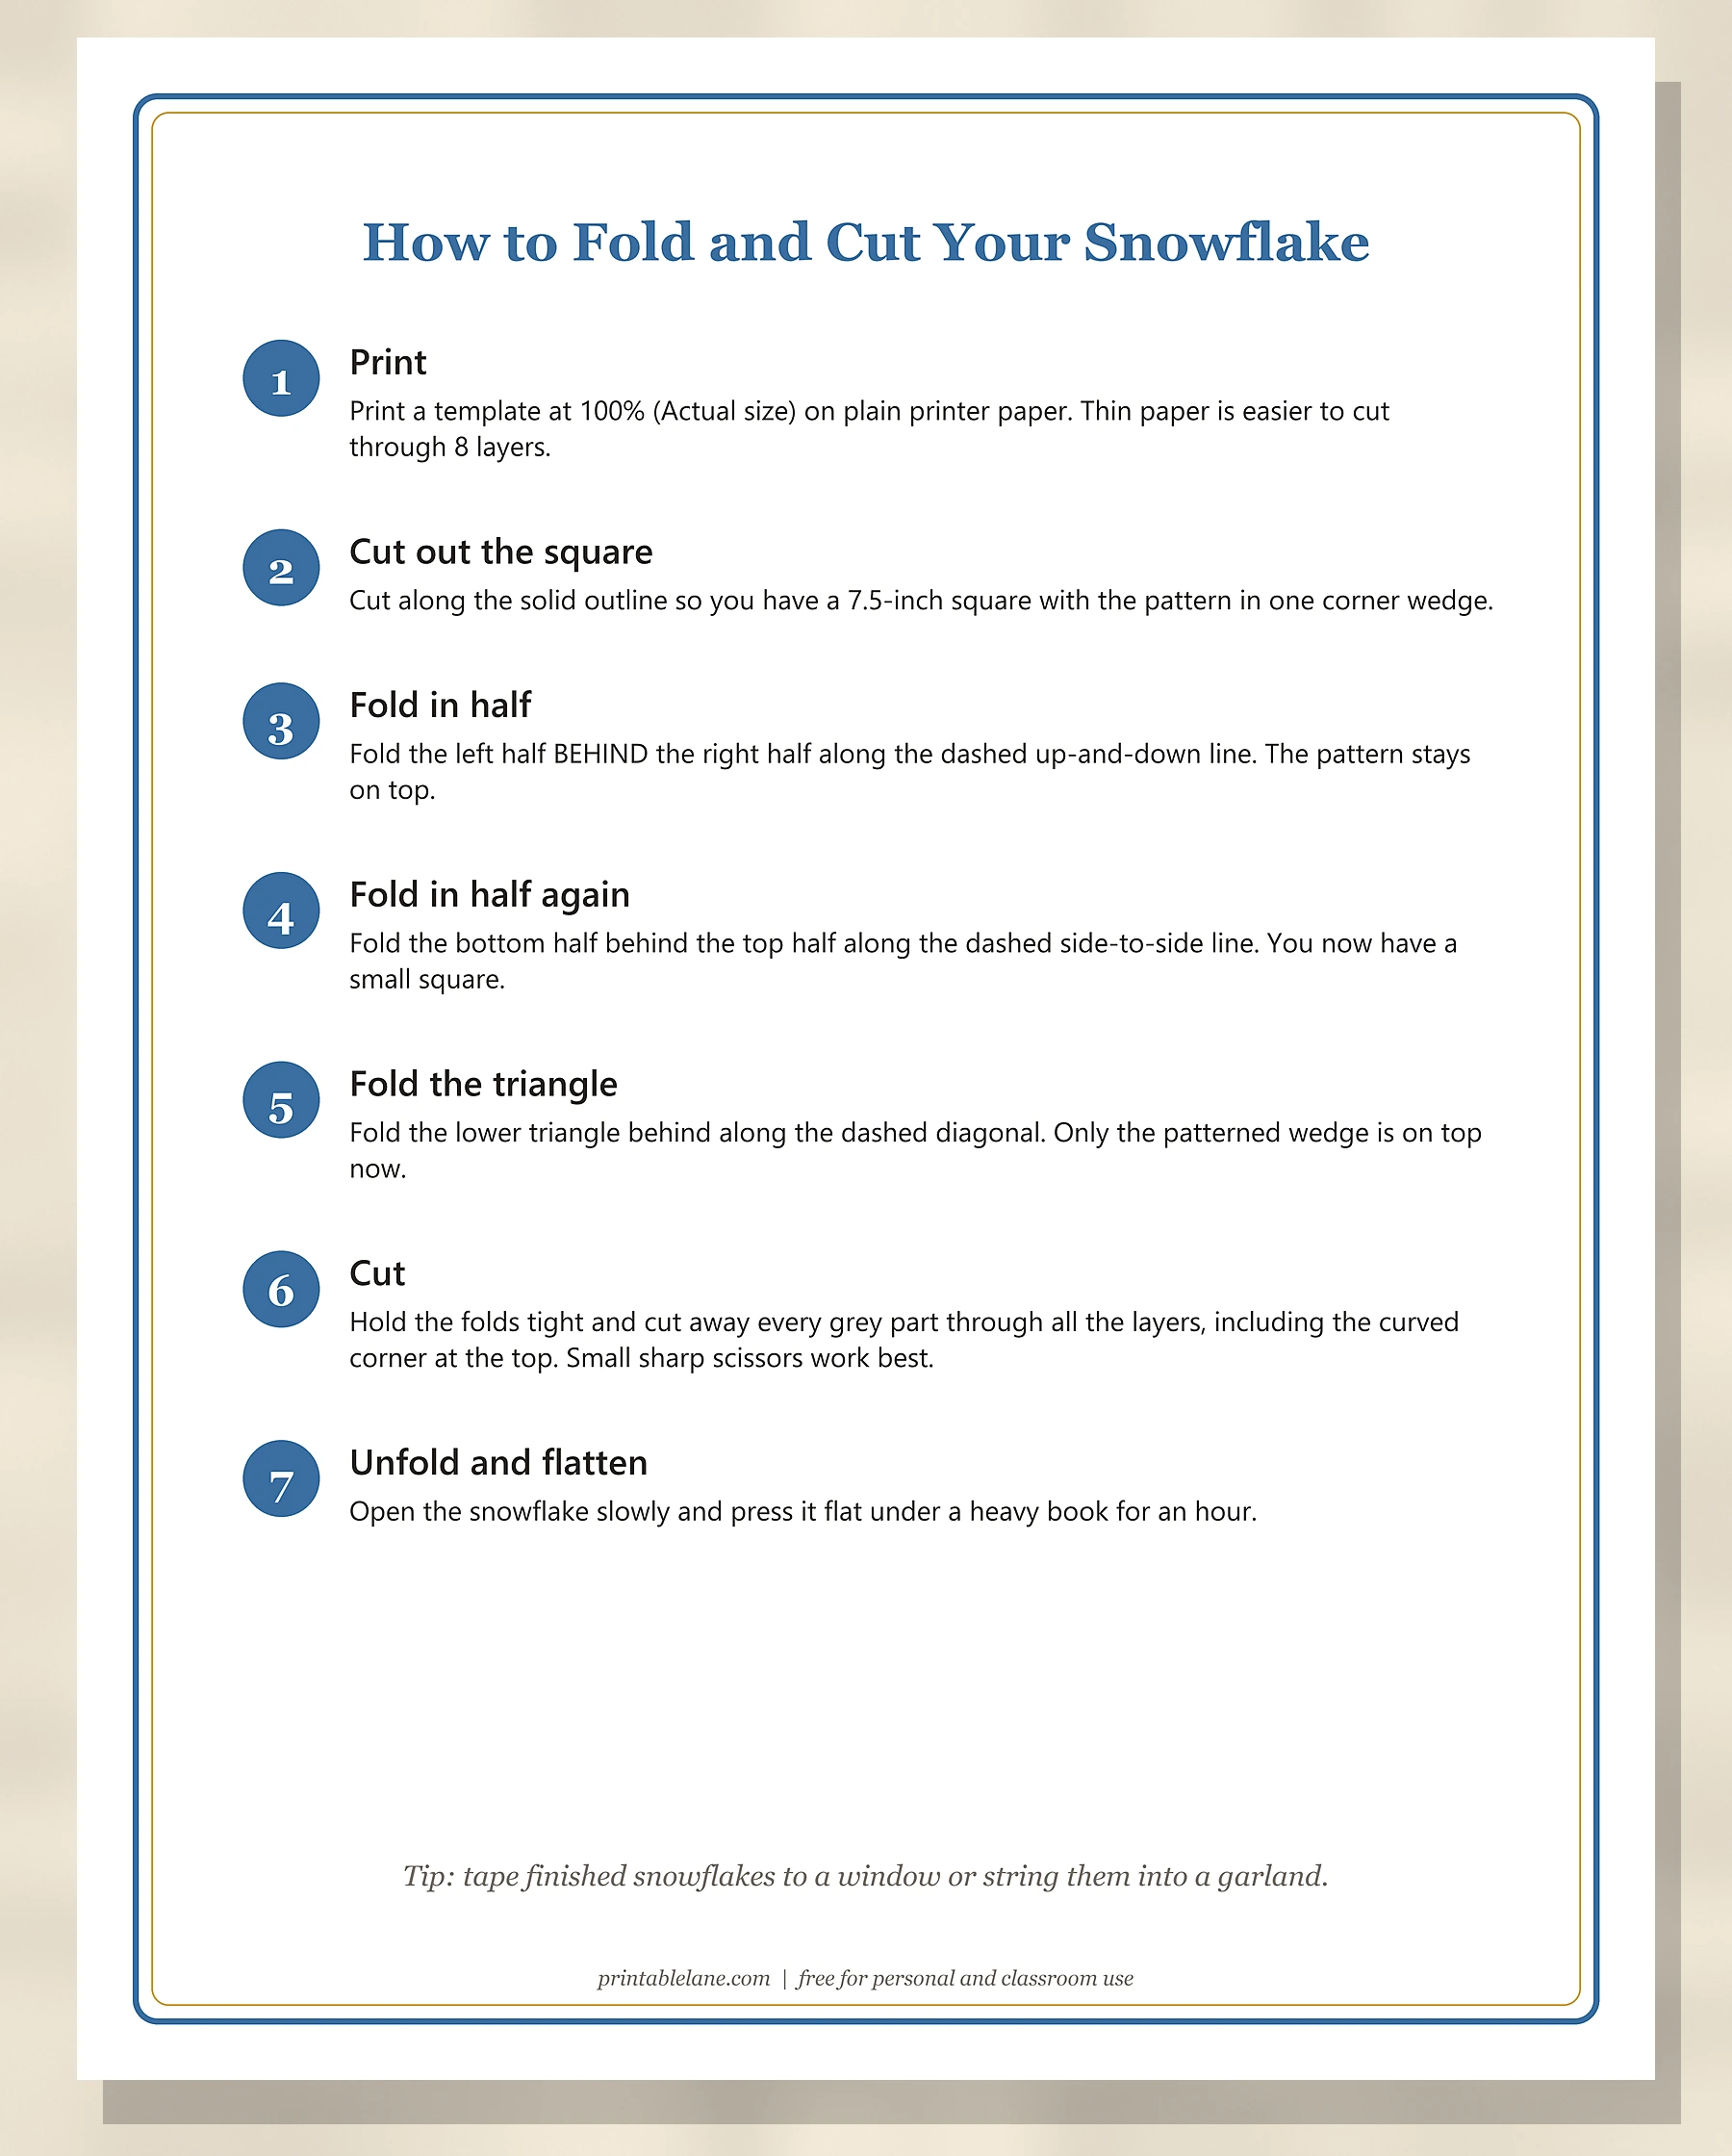
- Print a template at 100% on plain printer paper.
- Cut out the 7.5-inch square.
- Fold the left half behind the right half along the up-and-down line.
- Fold the bottom half behind the top half along the side-to-side line.
- Fold the lower triangle behind along the diagonal, so only the patterned wedge shows.
- Cut away every grey part, including the curved corner, through all layers.
- Unfold slowly and press flat under a book.
The six snowflake designs
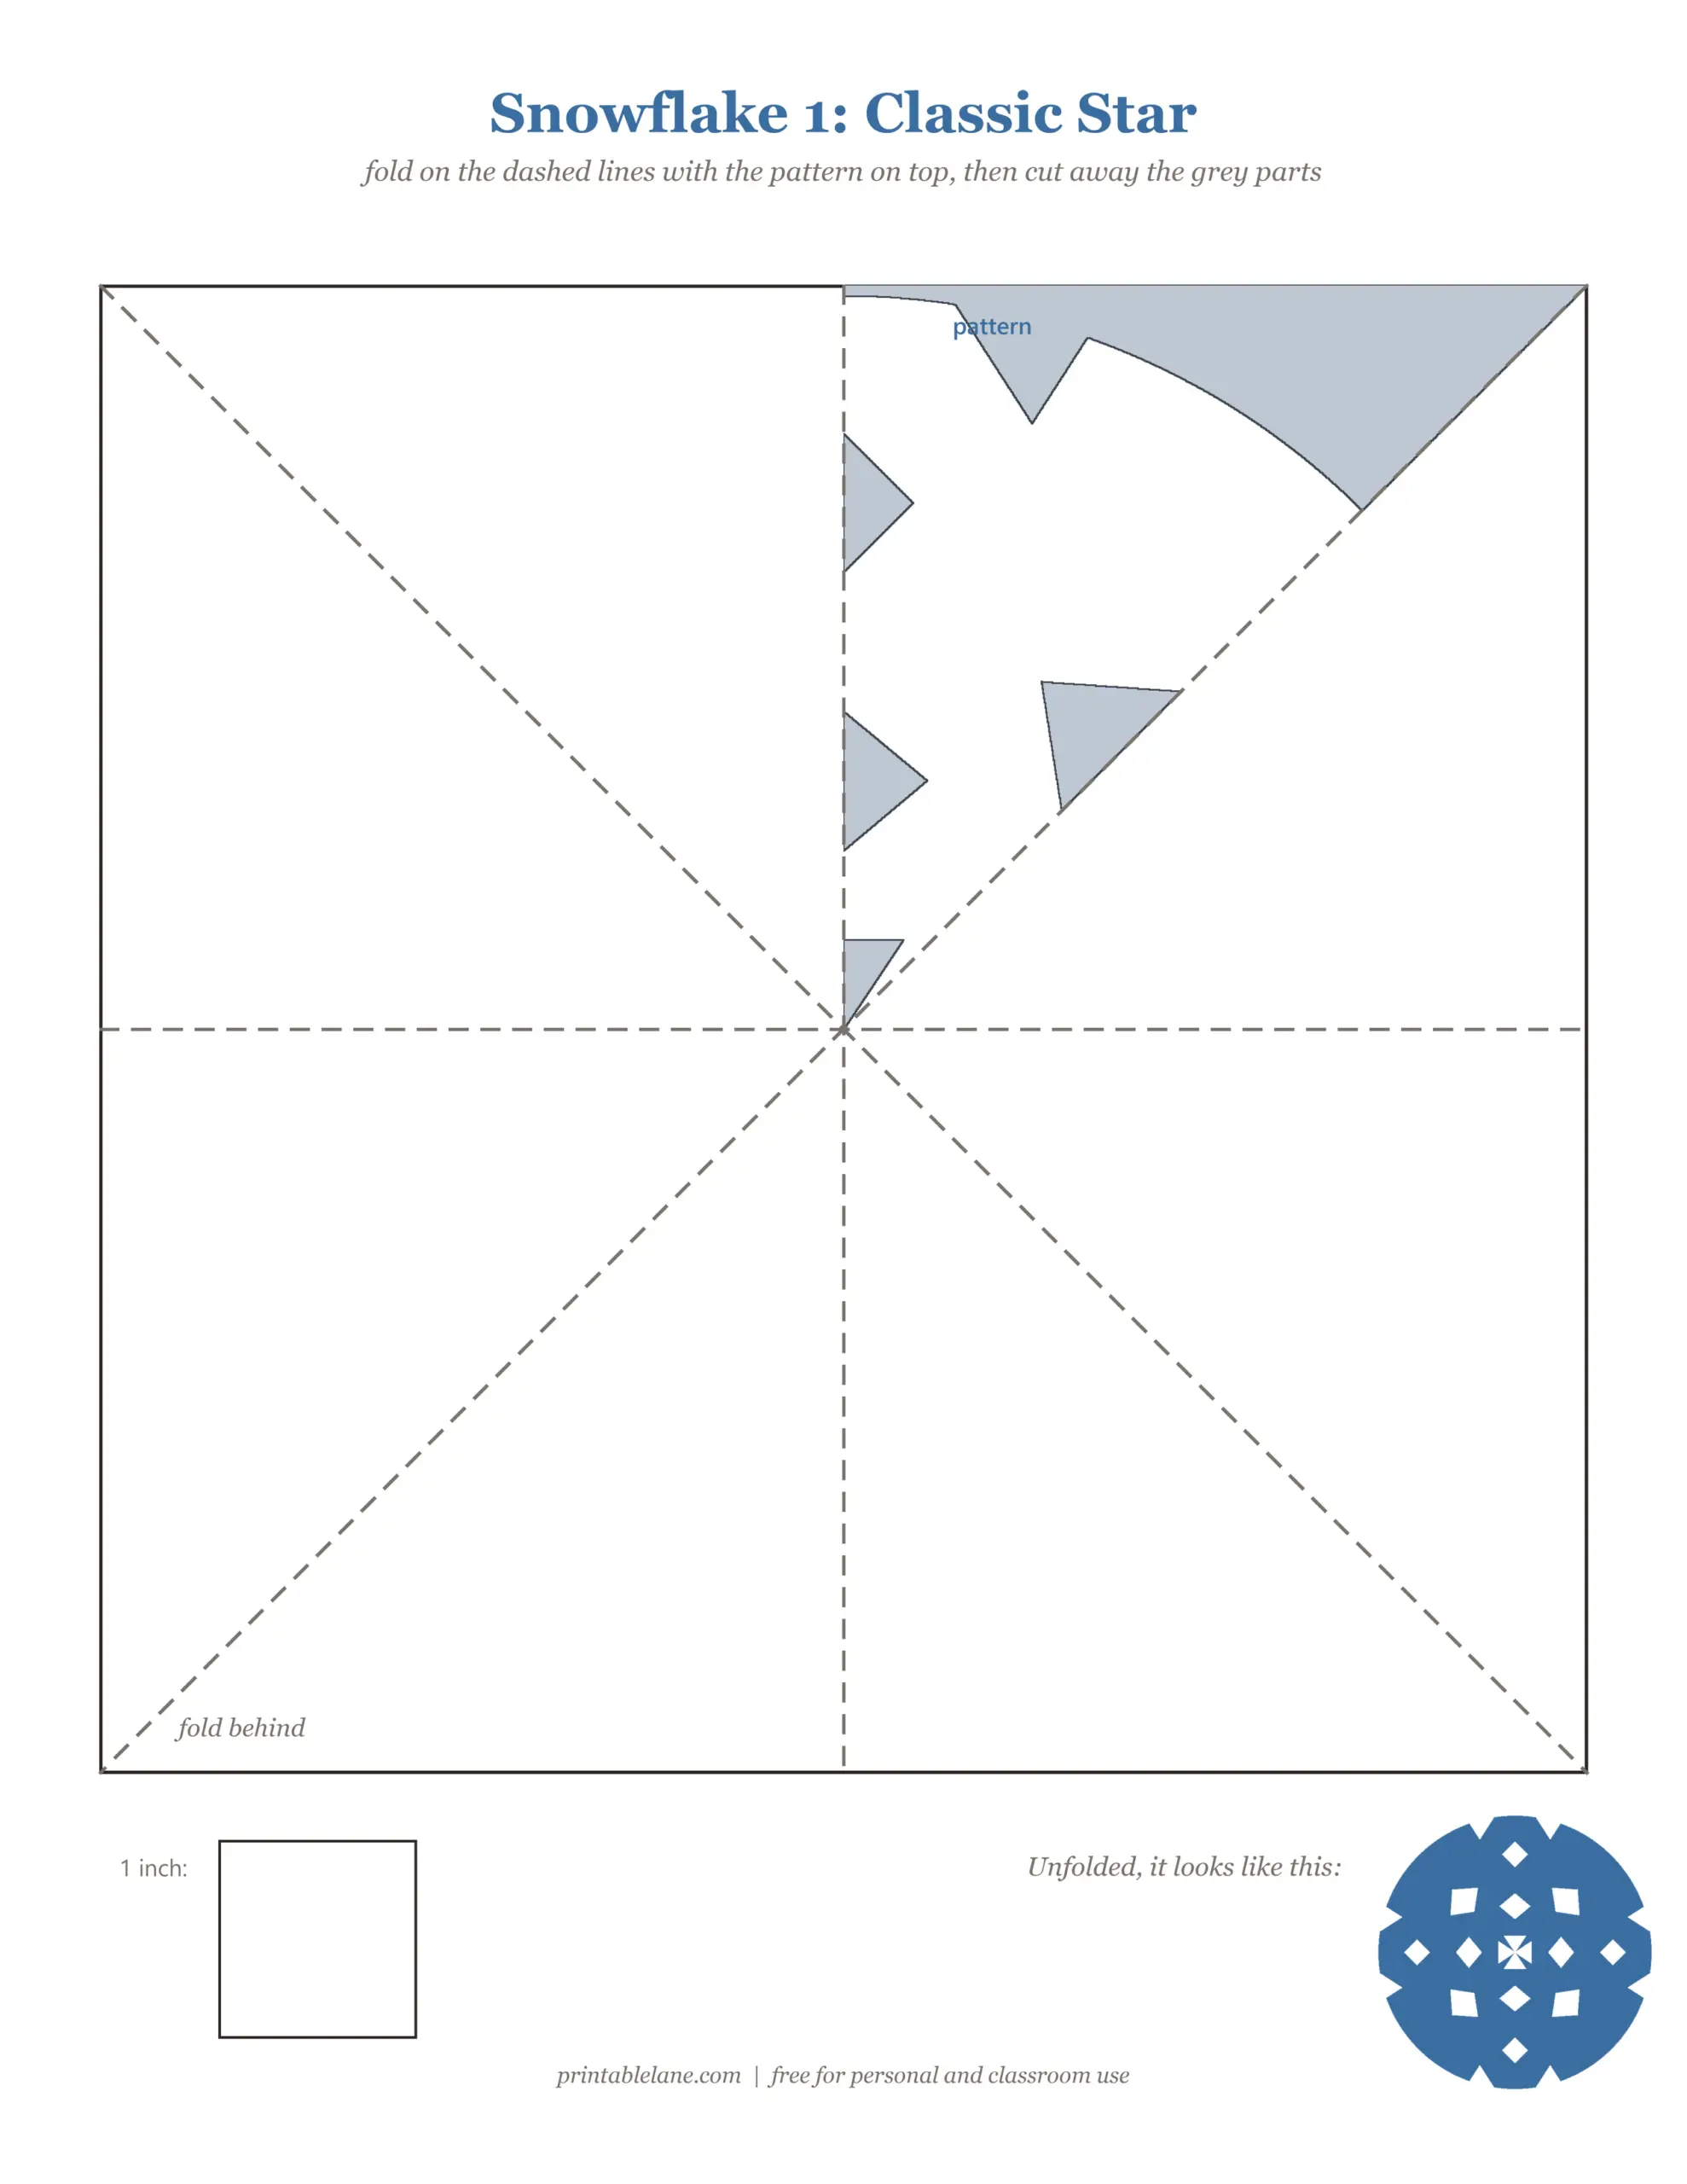
1. Classic Star
Pointed notches along both folds and a cut-off corner give a crisp, star-like flake. A great first try.
2. Frosty Bubbles
Round holes of different sizes make a soft, bubbly pattern. Circles are easy to cut with small scissors.
3. Lacy Fern
Many small notches along the folds turn into a delicate, lacy snowflake. Take your time on this one.
4. Starburst
Two long, thin cuts create bold rays that shoot out from the center. Very striking on a window.
5. Windowpane
Little square cut-outs make a grid of “windows”. It looks great in front of a light.
6. Little Trees
Triangle cuts on the folds become tiny tree shapes when you unfold the paper. Perfect for Christmas.
Design your own snowflake
Once kids understand how folding works, the blank template is the fun part. Draw shapes in the light blue wedge, shade the parts you want to cut, then fold and cut. Notches on the folded edges make the biggest holes, and rounded cuts on the outer edge give lacy tips.
Tips for neat snowflakes
- Use thin printer paper. Cardstock is too thick to cut through eight layers.
- Small, sharp scissors (or craft scissors with a fine tip) make the inside cuts much easier.
- Make sharp creases by running a fingernail along each fold.
- Leave at least 1/4 inch of paper between cuts so the snowflake does not fall apart.
- For younger kids, an adult can fold the paper and the child can cut the easiest design, Classic Star.
Which design should you start with?
If this is your first paper snowflake, start with Classic Star: it has only a few straight cuts, so it is hard to get wrong. Frosty Bubbles and Little Trees come next; the circles and triangles take a little more control but are still quick. Save Lacy Fern and Windowpane for when you are comfortable, because their small inside cuts need patience. Starburst looks dramatic but is actually simple, which makes it a good pick for a classroom where everyone needs a nice result fast.
With a group, print two or three designs per child. The first one is practice, the second usually turns out much neater, and kids love comparing how the same template came out a little different for everyone.
Turn it into a small math lesson
Paper snowflakes are a hands-on way to talk about symmetry. Before unfolding, ask kids to guess how many times the pattern will repeat. Then count the wedges together: eight, because the paper was folded into eight layers. Point out the lines of symmetry, the folds, and how a cut on a fold becomes one hole instead of two. Older kids can try to predict the finished shape by sketching it before they cut, then check their drawing against the result.
It is also a nice moment to mention real snow: real snowflakes almost always have six arms because of how water molecules link up as they freeze. Kids who want a challenge can try folding a square into six wedges (in thirds after the first fold) and cutting the blank template that way.
Ways to use your paper snowflakes
- Tape them to a window for a winter scene.
- String several on thread for a snowflake garland.
- Glue one to a folded card for a handmade Christmas card.
- Hang them from the ceiling with fishing line so they spin.
- Use them as stencils: lay one on paper and dab paint over it.
Download single pages
Need just one design? Click a link to open the full-size PNG. The PDF with every page is in the download box.
- How to fold and cut (PNG)
- Template 1: Classic Star (PNG)
- Template 2: Frosty Bubbles (PNG)
- Template 3: Lacy Fern (PNG)
- Template 4: Starburst (PNG)
- Template 5: Windowpane (PNG)
- Template 6: Little Trees (PNG)
- Finished snowflakes (PNG)
- Blank template (PNG)
More winter crafts: paper Christmas village, Christmas ornament templates, gingerbread house template and winter coloring pages. Or browse all our free printables.
Frequently asked questions
How do you fold paper for a snowflake?
With these templates, fold the square in half, in half again and then along the diagonal, always folding the other parts behind the printed wedge. That stacks eight layers.
Why does my snowflake have 8 points and not 6?
Folding a square on straight lines gives 8 equal wedges, which is easier and more accurate for kids. Real snowflakes have 6 points, but paper ones look lovely either way.
What paper is best for paper snowflakes?
Thin white printer paper. Thicker paper is hard to cut through all the layers.
What age is this craft for?
Kids from about 6 can fold and cut the easy designs with help. Older kids and adults can try the lacy ones and design their own.